Apply
  1. U of R Home
  2. Admissions
  3. Application Guide
  4. How to share your Transcript with the U of R through MyCreds™

How to share your Transcript with the U of R through MyCreds™

This guide will walk you through the process of sharing your documents with the University of Regina. Saskatchewan high school and Adult 12 transcripts have recently moved to using the MyCreds™ Learner Portal.

Go to learner.mycreds.ca.

1. Request transcripts from the Saskatchewan Student and Educator Services
Visit the Saskatchwan Student and Educator Services transcript request page and enter your personal information and then your contact information in the form fields provided there. Click on the "Next" button after each step.
2. Upload a photo of your government-issued photo ID.
Follow the instructions on the Saskatchewan Student and Educator Services transcript request page to upload a photo of your ID.
3. Upload a photo of your face next to your government-issued photo ID.
Follow the instructions on the Saskatchewan Student and Educator Services transcript request page to upload a photo of you holding your ID.
4. Submit your information to Saskatchewan Student and Educator Services.
Click the "Submit" button to complete your transcript request.
5. Wait for confirmation from the Ministry of Education.
You will recieve a confirmation email from the Ministry of Education indicating that your transcript has been approved for sharing via MyCreds.
6. Register for a MyCreds account.
Click on the link in the email to Register for a MyCreds account.
7. Create a MyCreds account.

On the MyCreds log-in page, create a password.

MyCreds Screenshot 1


8. Wait for the 2-factor authentication request.
A 2-factor authentication verification number will be sent to your email.
9. Complete the 2-factor authentication request.
Enter the code that was sent to you into the MyCreds site to complete the request.
10. Go to the documents page.

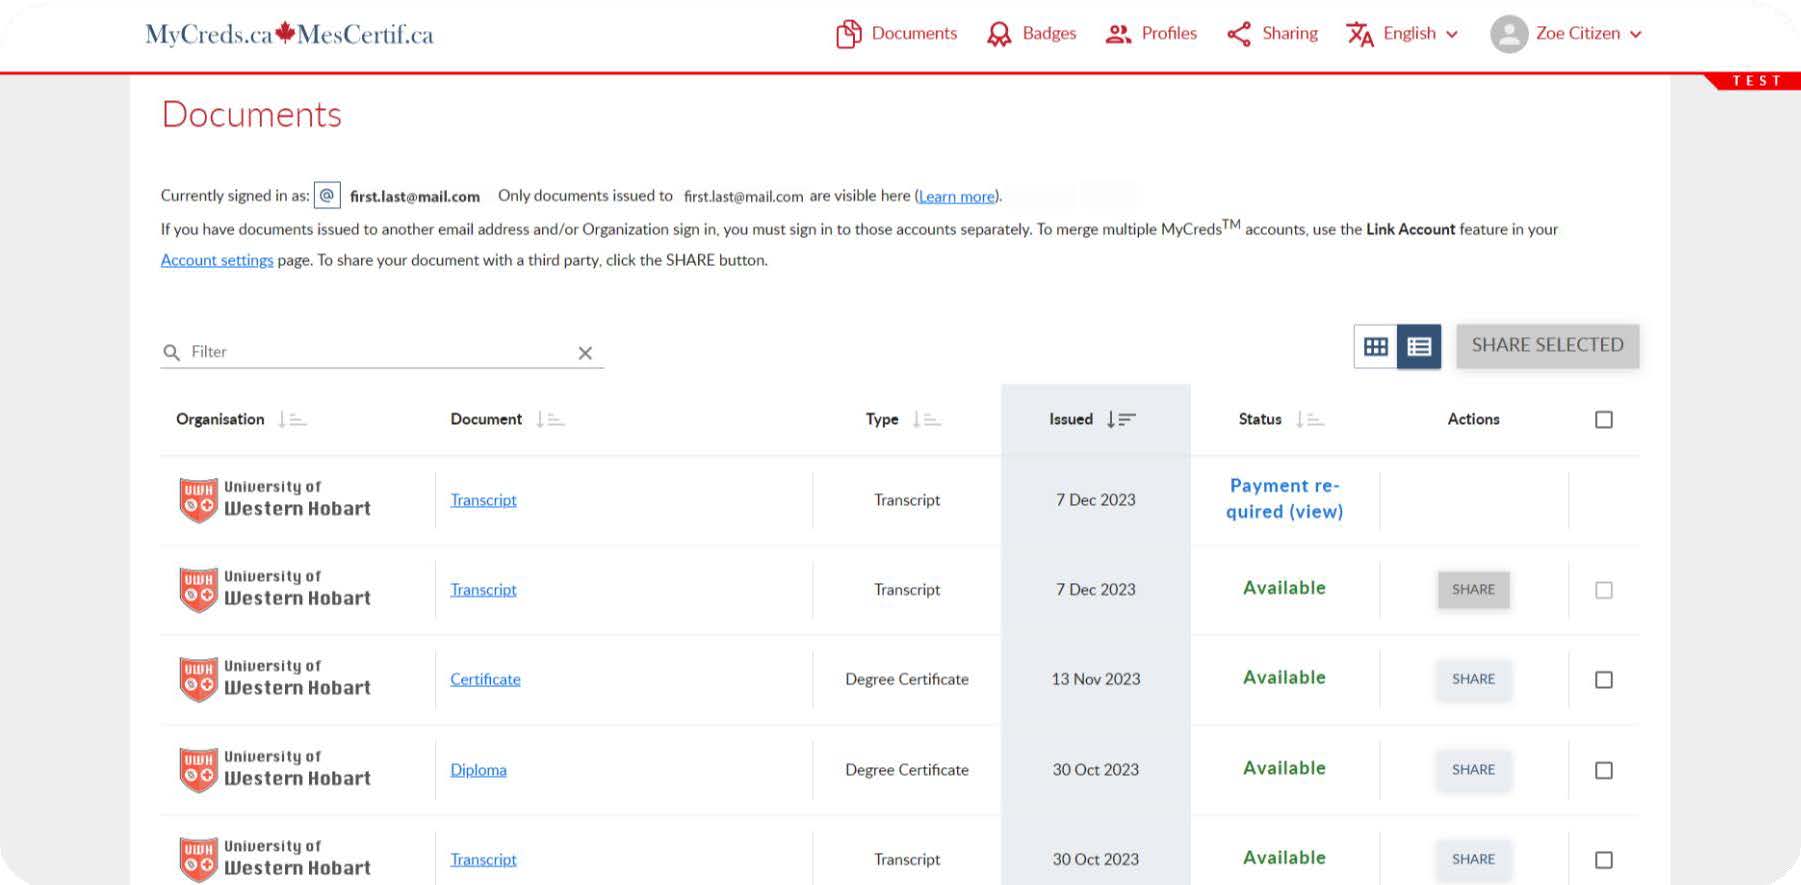
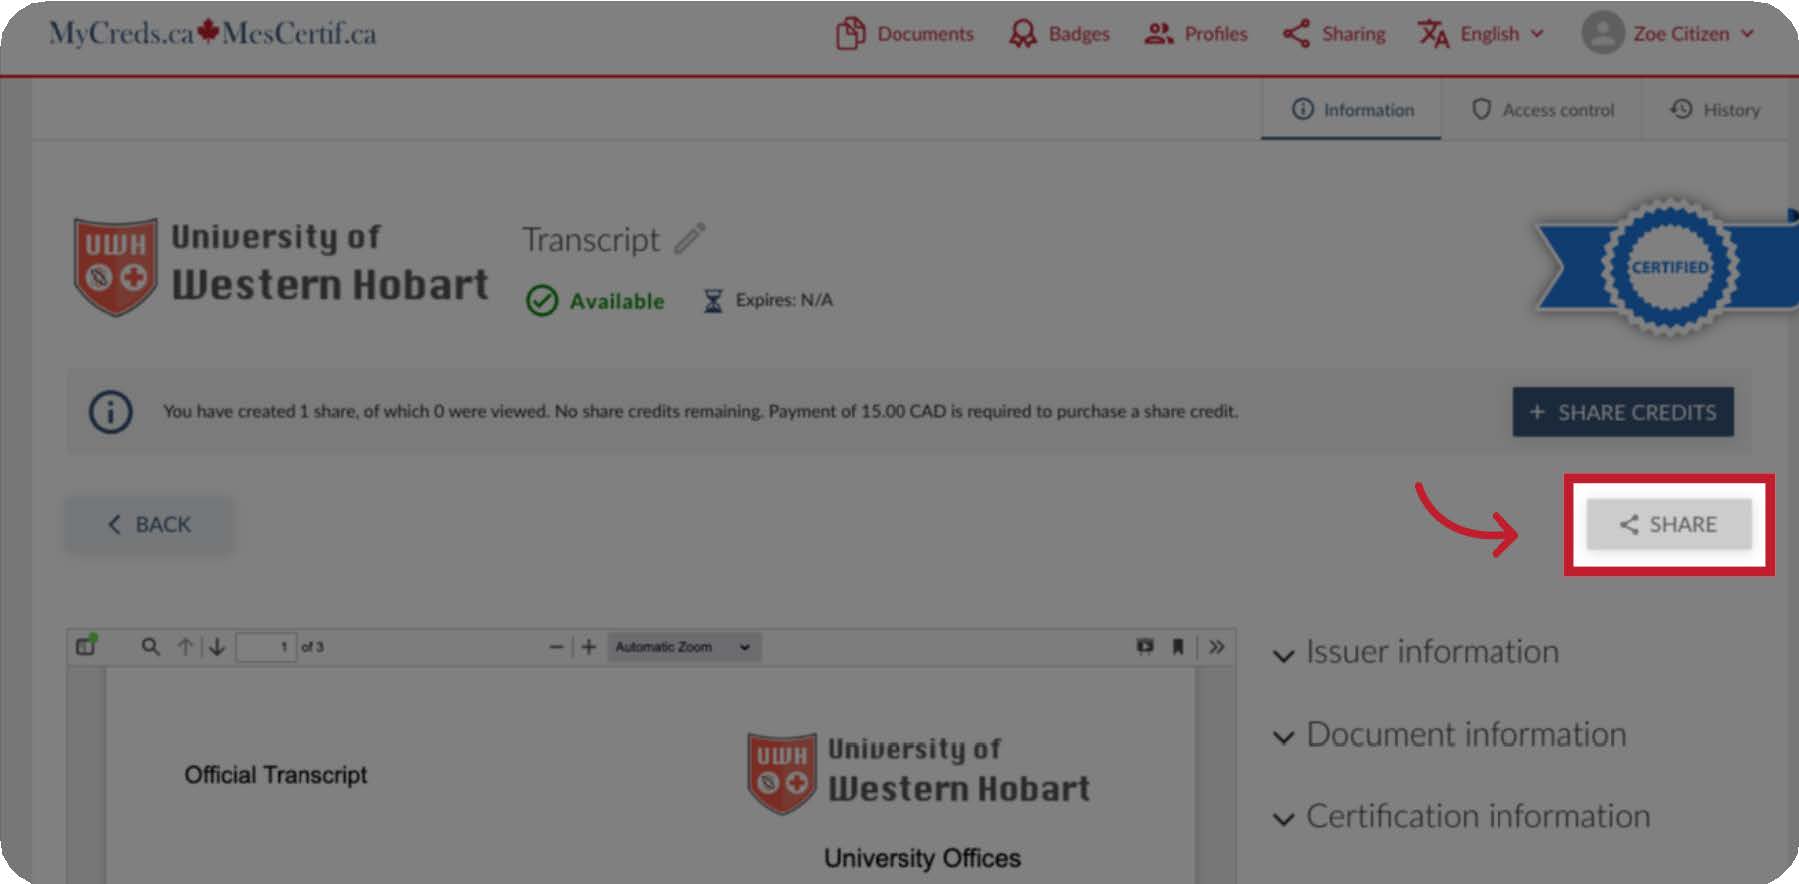
Sharing a document on MyCreds is simple and instantaneous. On the documents page of your MyCreds Portal, open the document you want to share by clicking on the document title.

Screenshot 1

11. Click "Share".

Click the “Share” button.

Screenshot 2

12. If the Share button is gray.

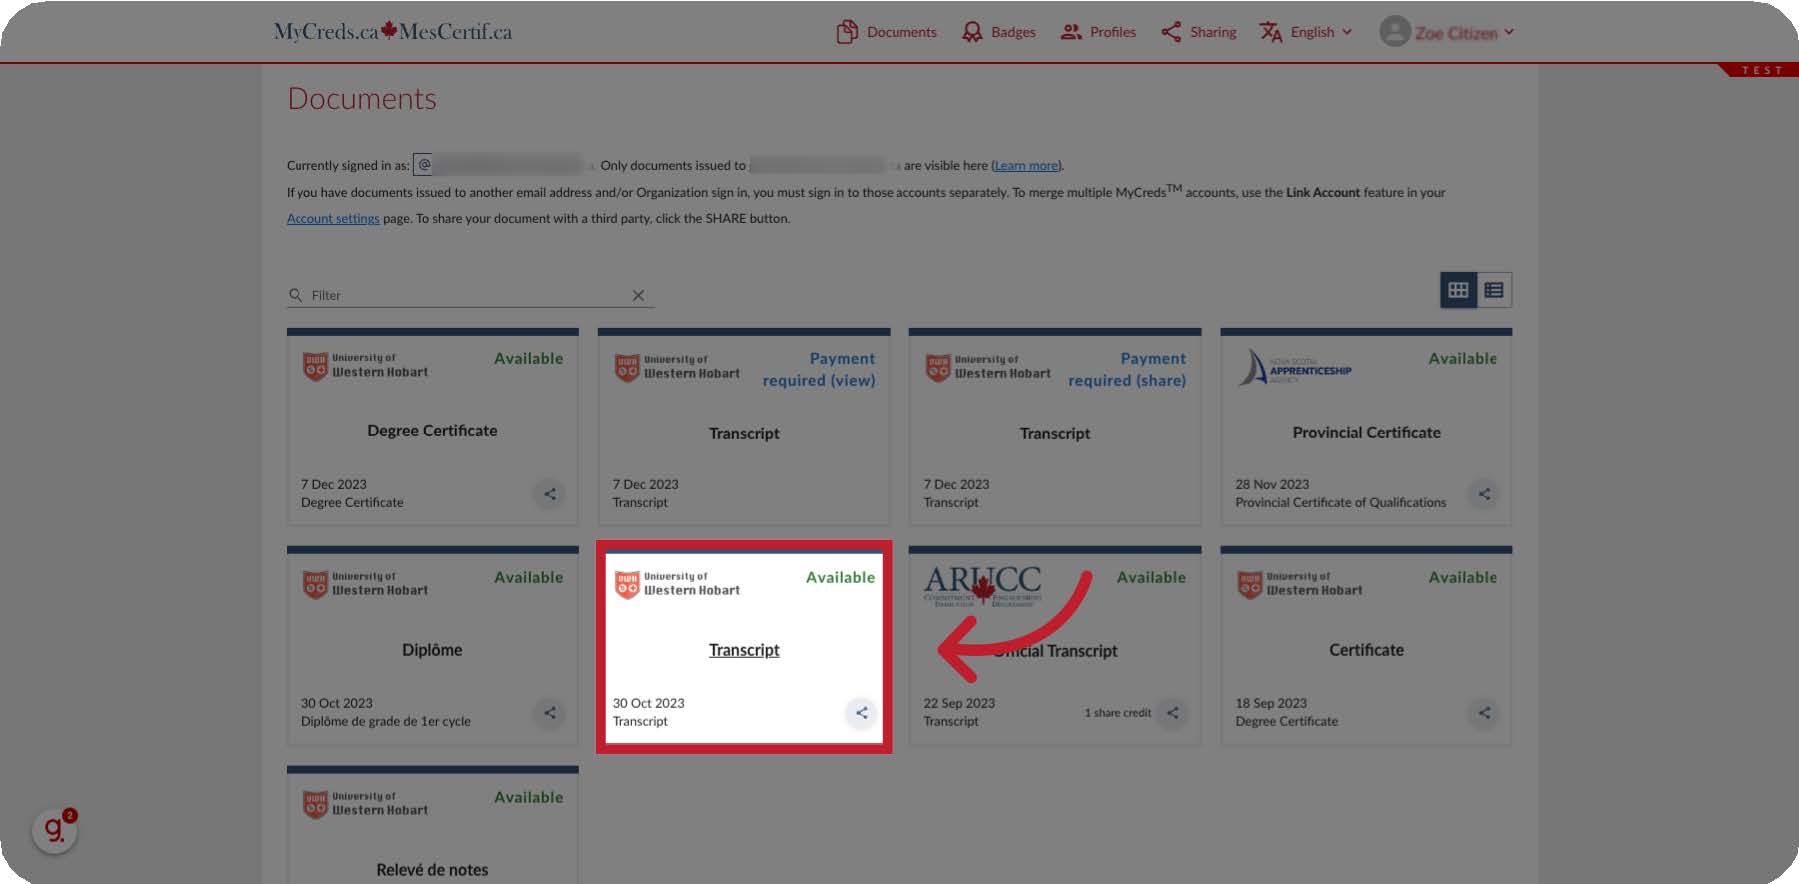
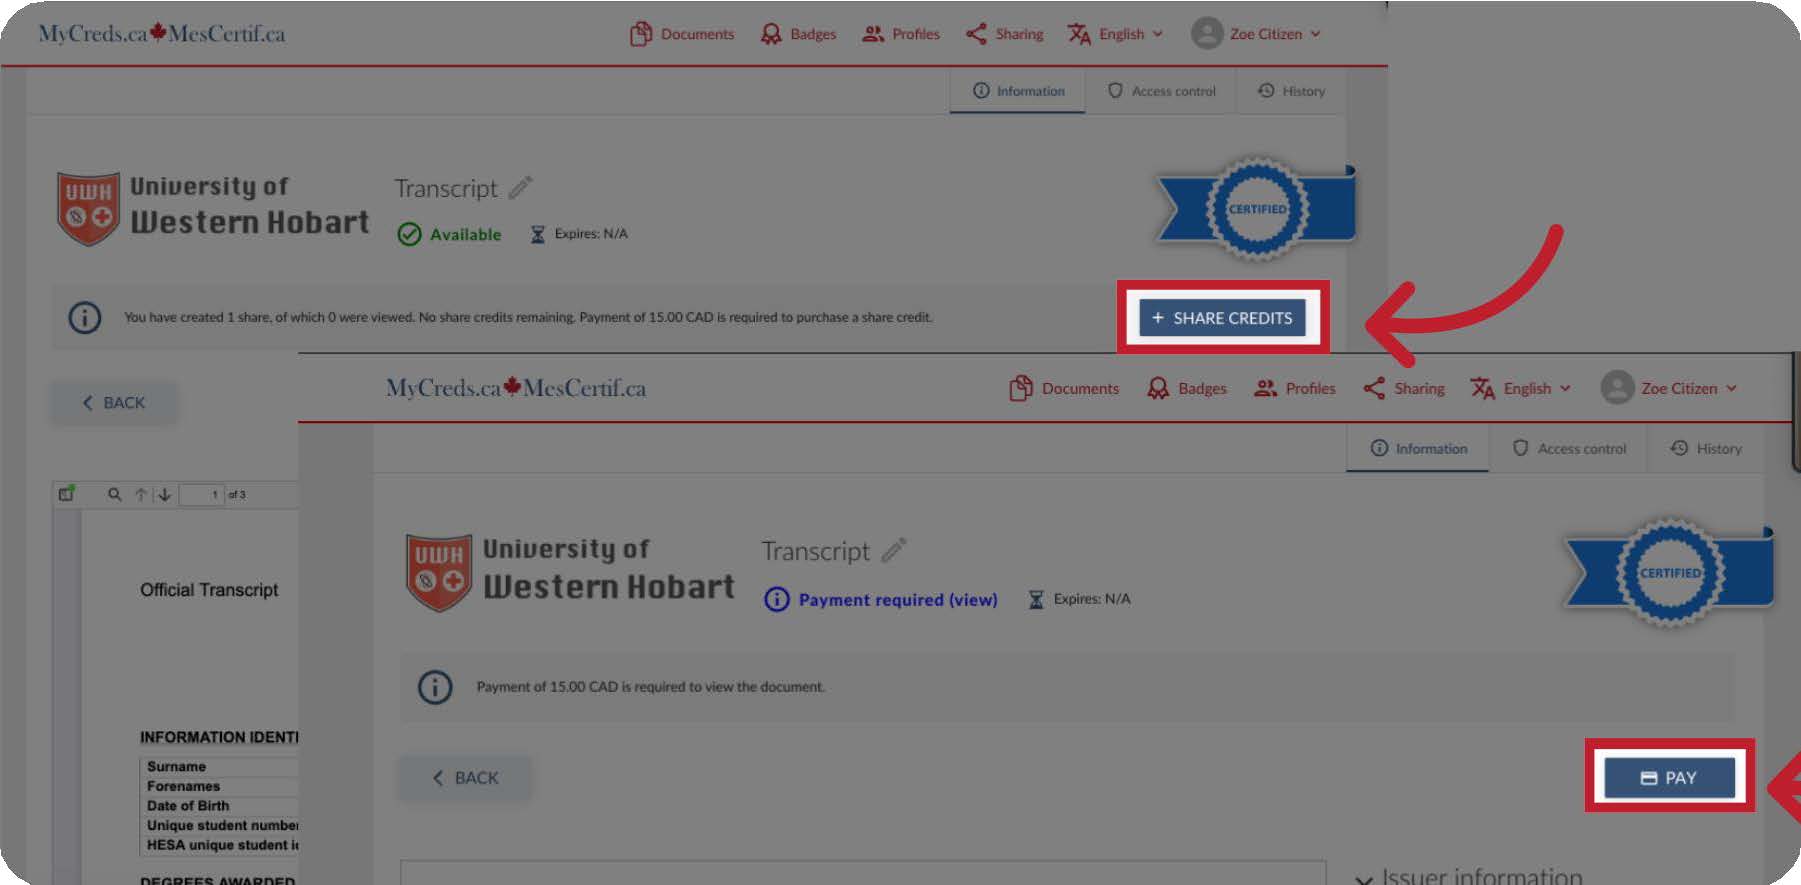
If the share button is gray and not selectable, you will need to purchase share credits or pay to pickup your document.

Screenshot 3

13. Click the "+Share Credits" or "Pay" button.

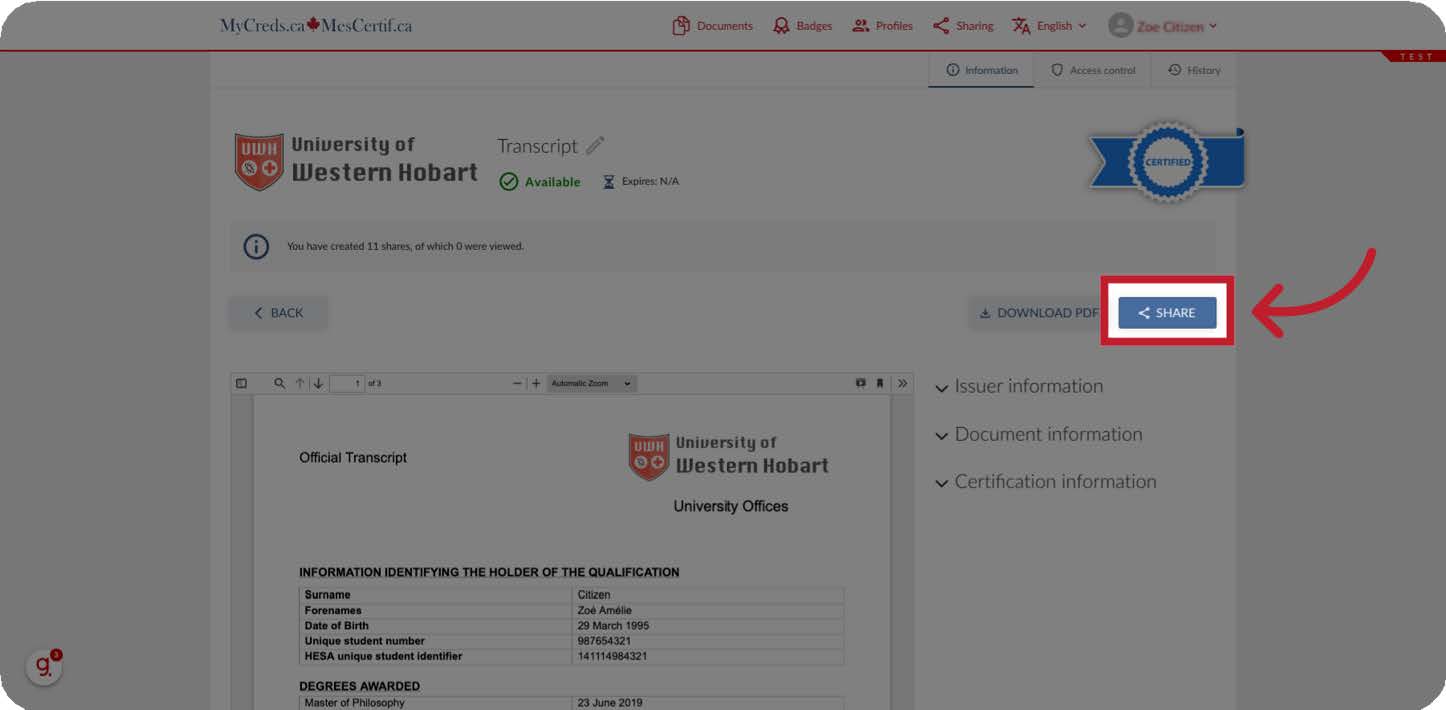
Click the “+Share Credits” or “Pay" button and follow the payment instructions prior to sharing your document.

Screenshot 4

14. Select Organization.

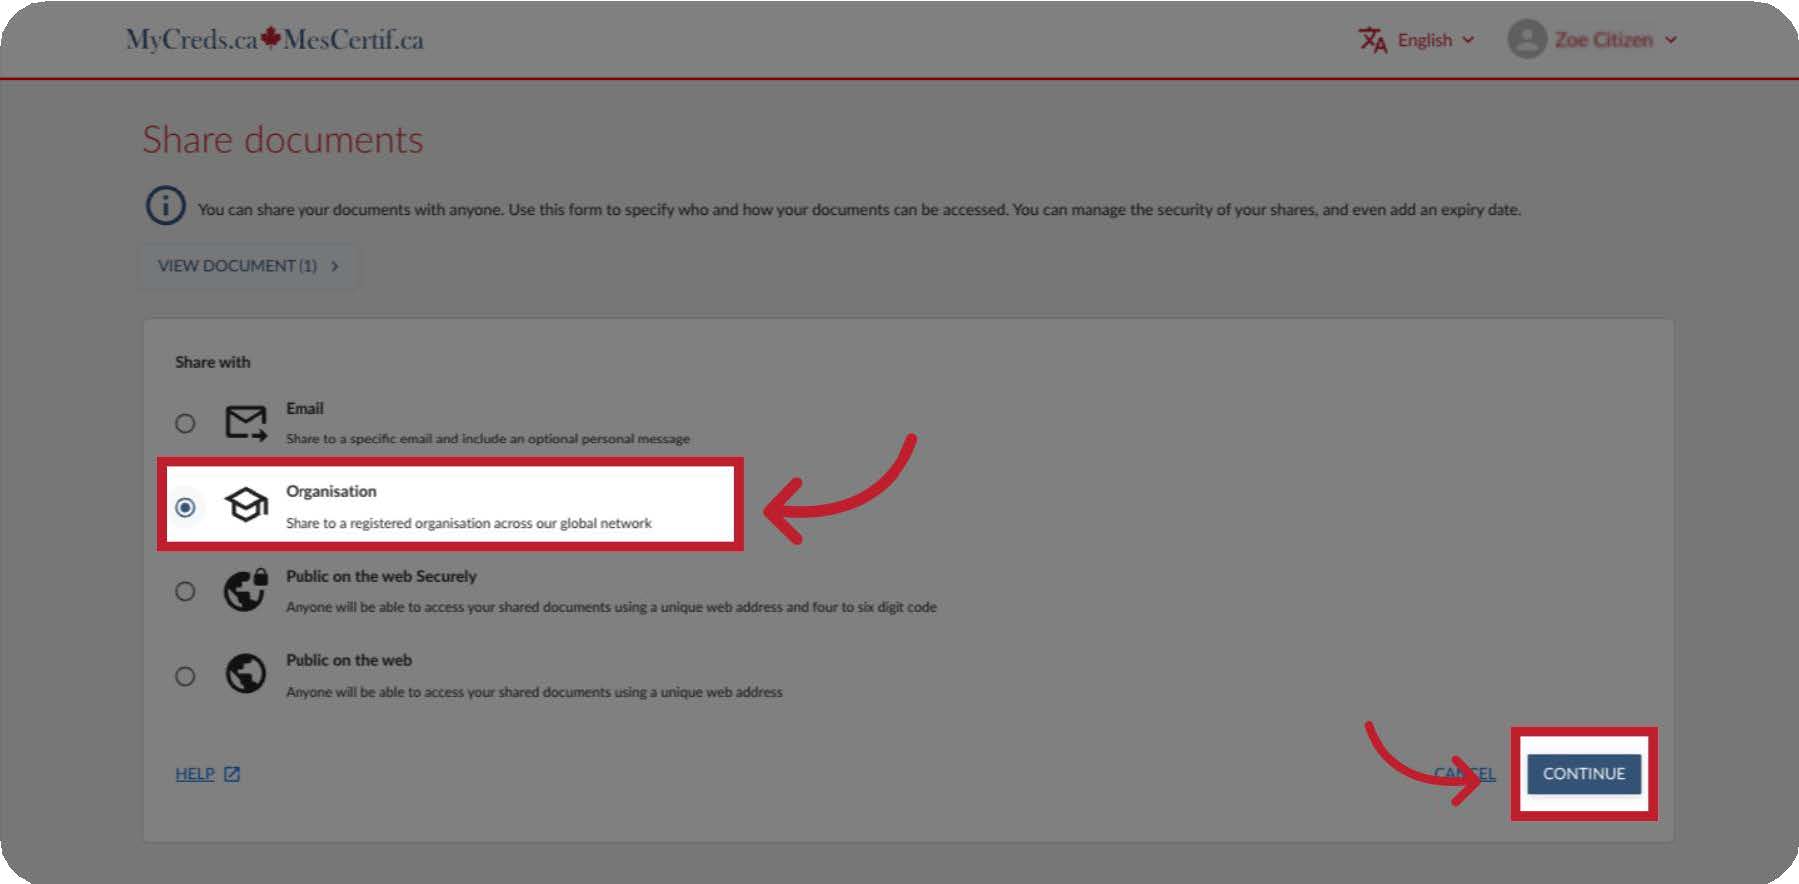
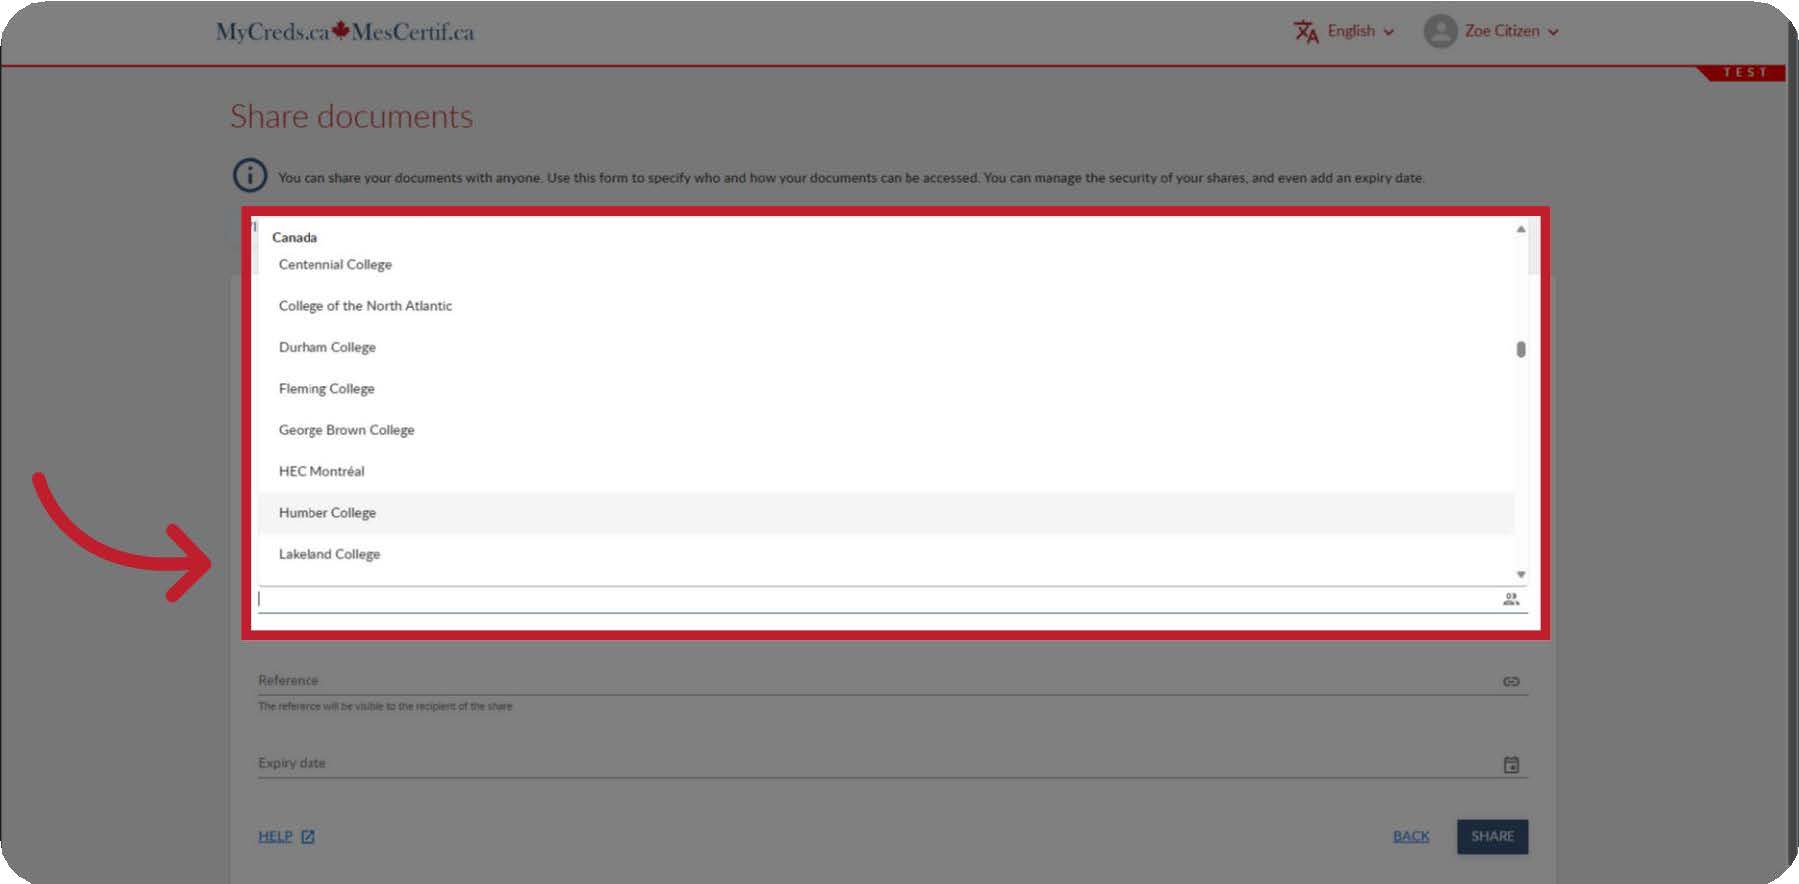
Once you click the “Share” button, the document sharing page will be available. Select “Organization” and click the “Continue” button.

Screenshot 5

15. Fill out share name and purpose share fields.

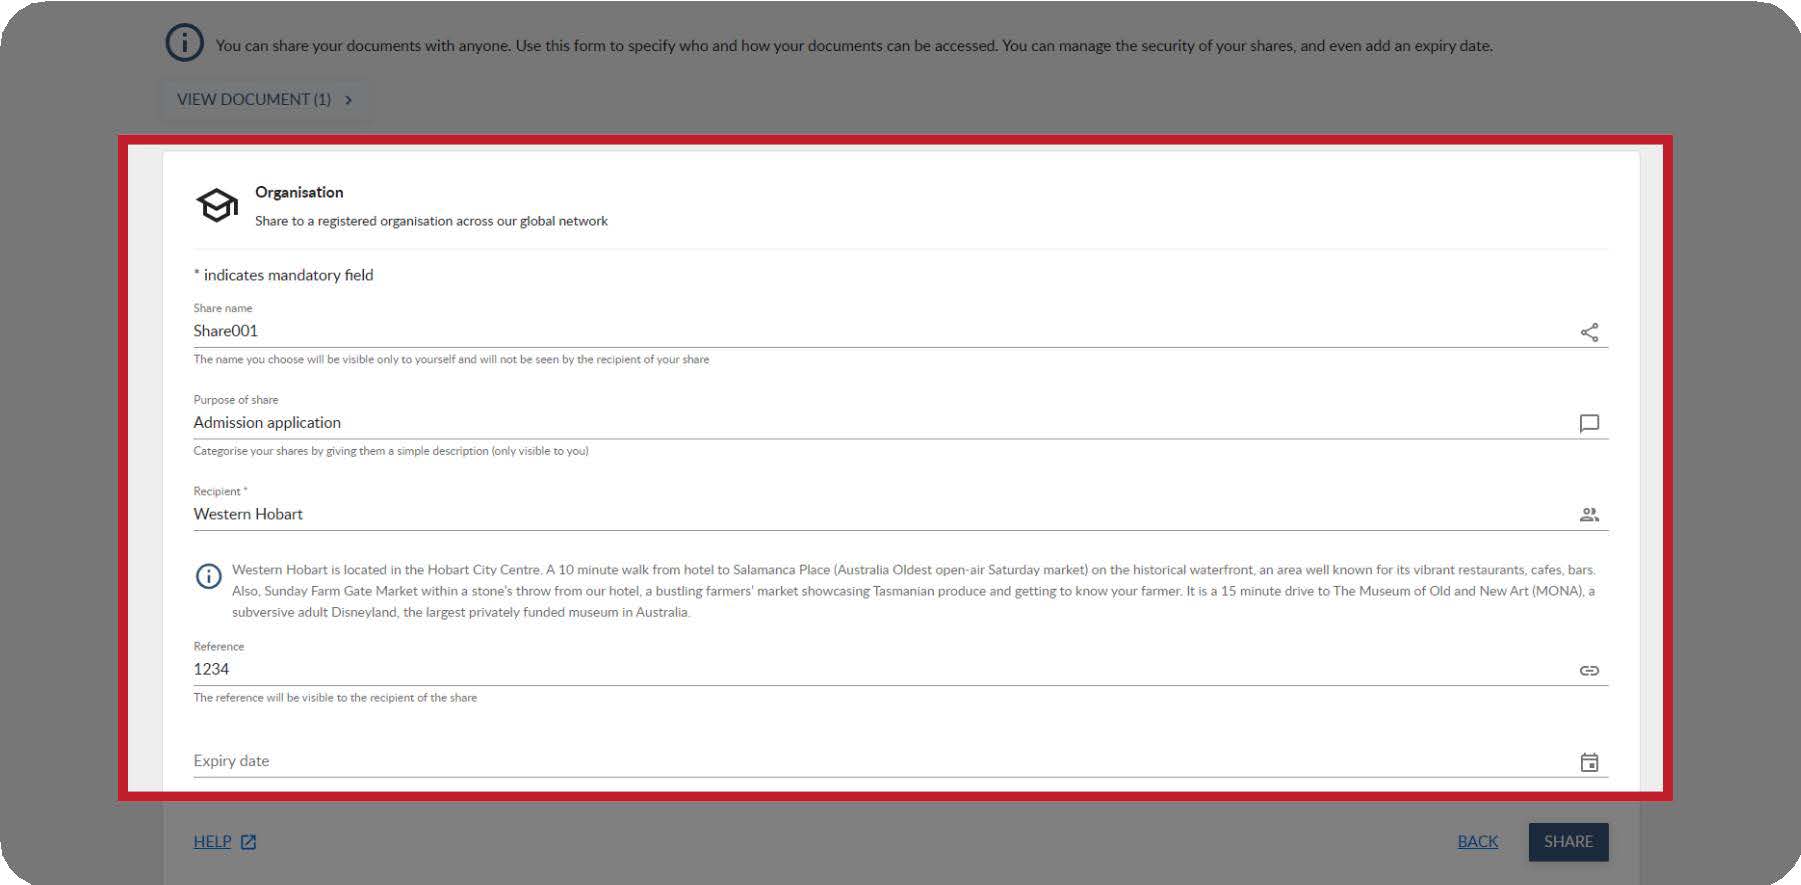
The “Share name” and “Purpose of share” are only visible to you and are used to keep track of the shares that you make.

Screenshot 6

16. Select the "Recipient *" organization

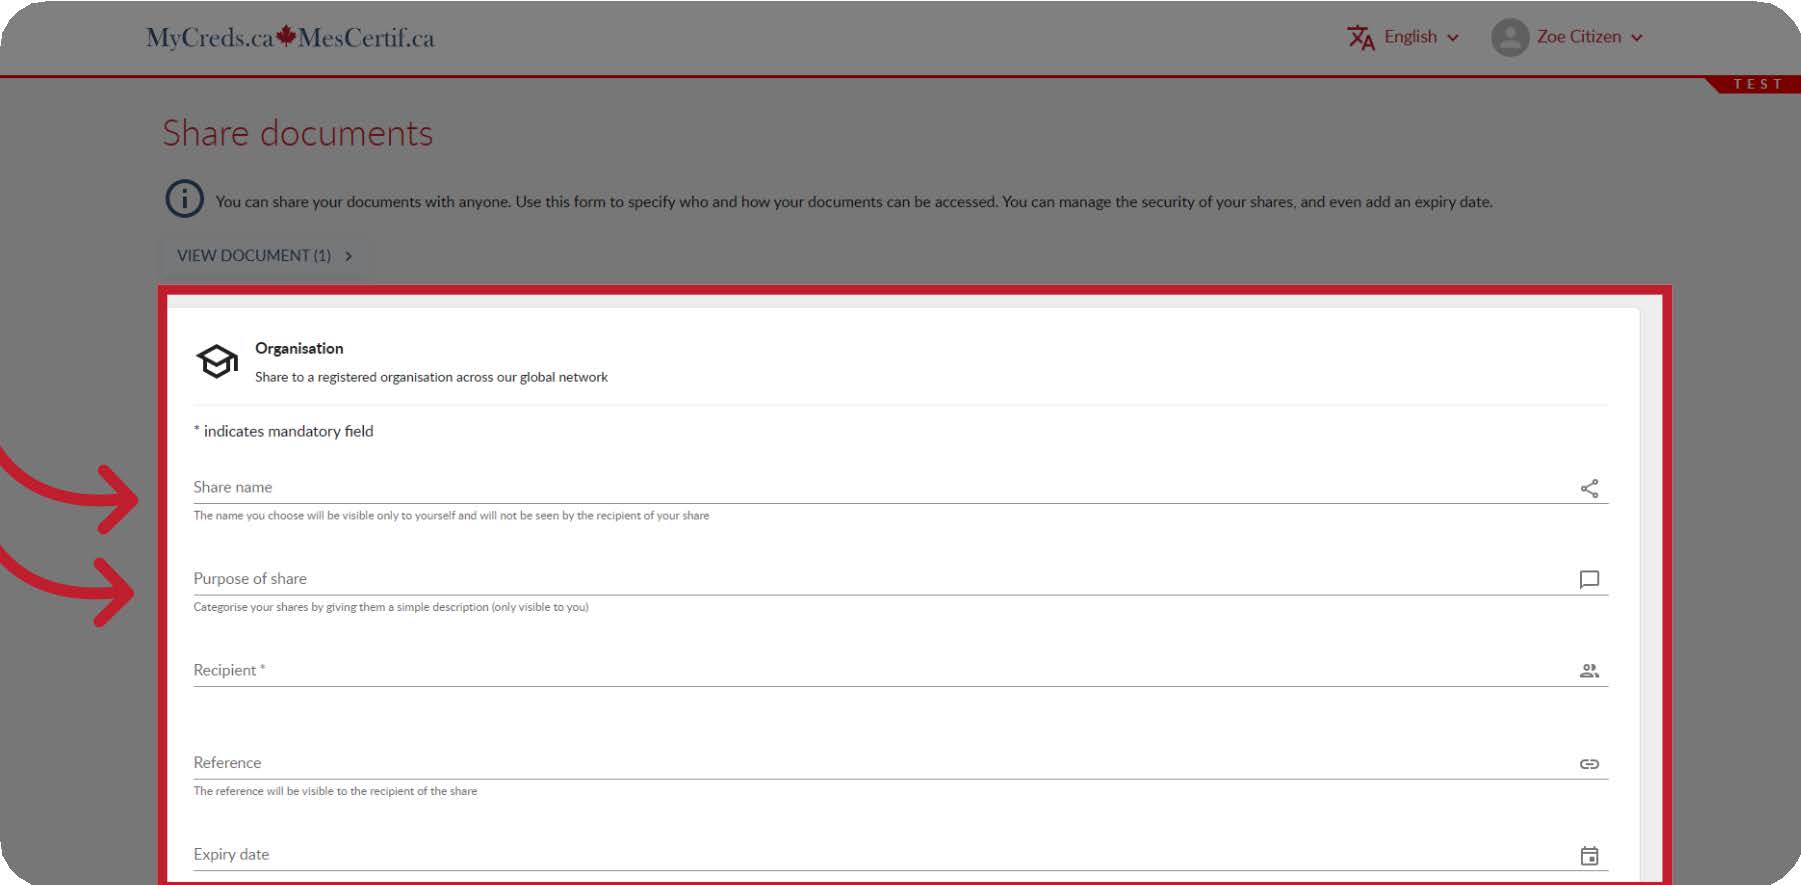
Select the Recipient organization from the drop down list. This is where you will select the University of Regina.

Screenshot 7

17. If applicable, fill in other fields.

Additional fields may now appear for you to complete based on the receiving organization's requirements. Fill in the other fields; required fields are marked with an asterisk (*).

Screenshot 8

18. Click "Finish".

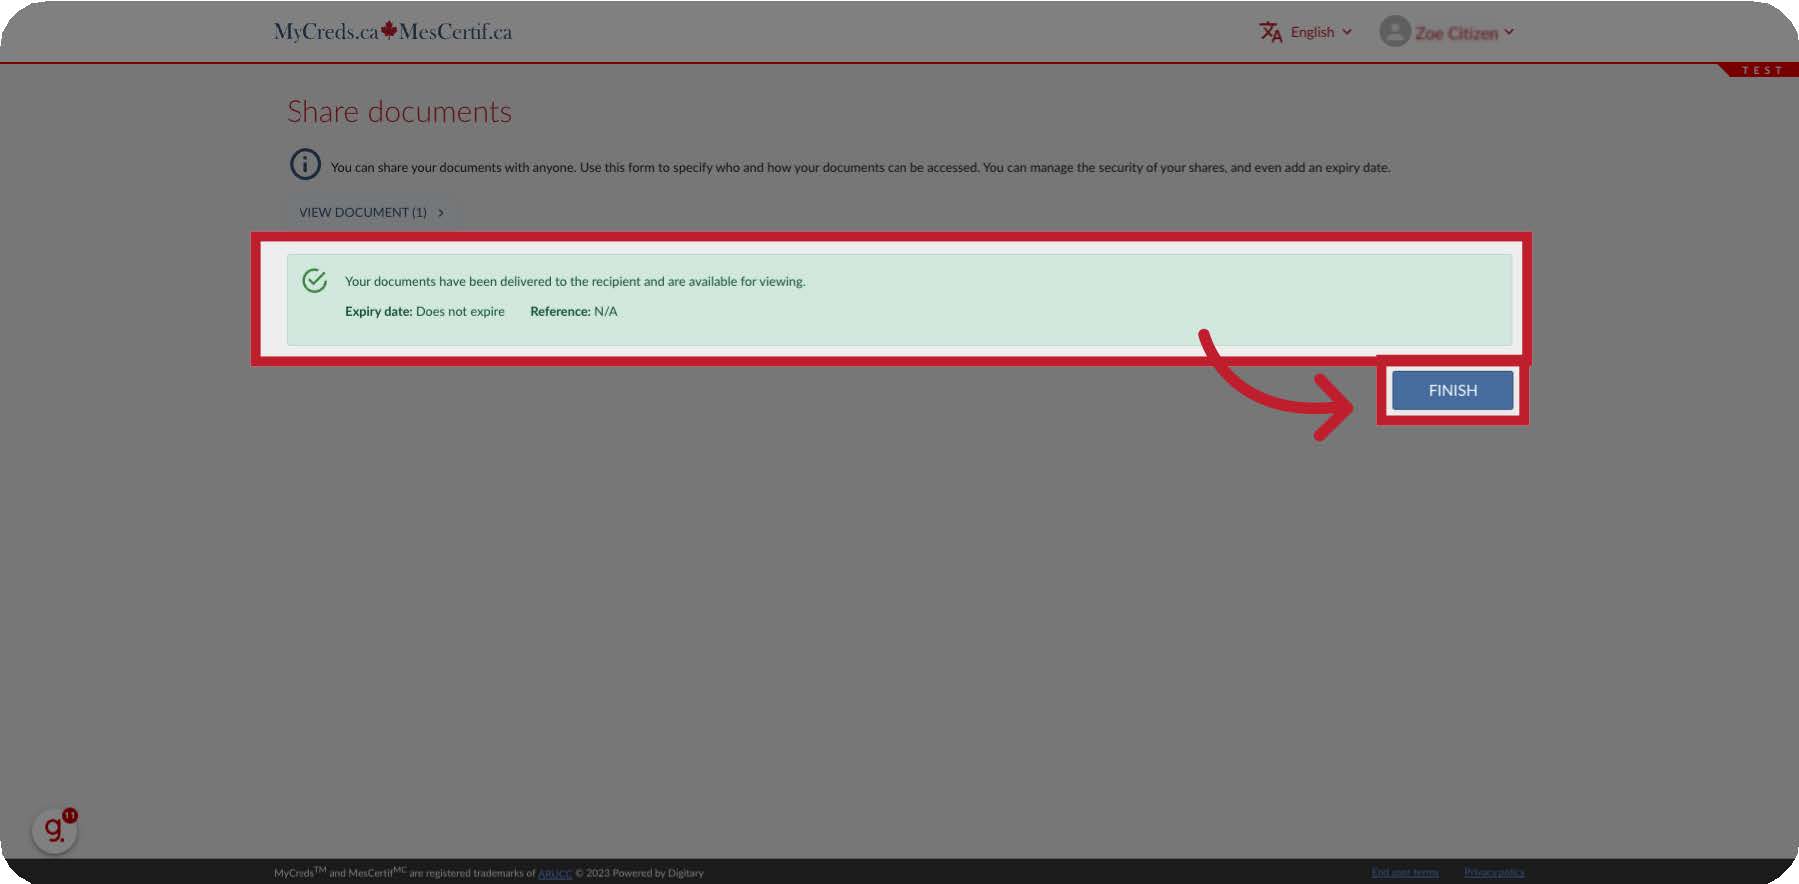
A page will appear indicating that your document has been shared with the registered organization. Ensure you Click "Finish" to complete the process successfully and to return to the document page.

Screenshot 11

19. Updated and Final Marks.

By sharing your transcript through the above process, the U of R will receive updates when interim or final marks are made available. You will not need to pay for and re-share the document.

Screenshot 12