Papercut Setup for Windows
Computing Services Technote #557 v1
iPrint was decommissioned effective January 2, 2025 – previous instructions are at iPrint Technotes.
Papercut Setup for Windows
Applies to: Windows Users needing to print to printers/copiers managed by Papercut
Section: Network
Owner: Manager, Network & Communication Services
Last updated: September 2026
Procedure to setup Printer
1. Download PaperCut Print Deploy bundle2. Run the installer .exe. file.
- Once completed there will be a new green printer icon in the taskbar, this is the PaperCut Print Deploy icon.
- NOTE: Step 1 & 2 only required if you do NOT already have the Papercut icon:
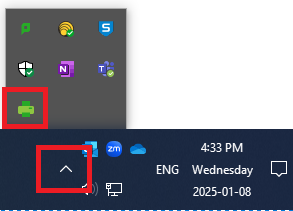
3. Right-click on the PaperCut Print Deploy icon in the taskbar, and select "View My Printers" to see queues that are installed.
4. Click the “Add Printers” tab to show additional queues available:
- Use search bar at top right to find print queues based on the building/room number, as well as Find Me queues for walk-up secure release printing.
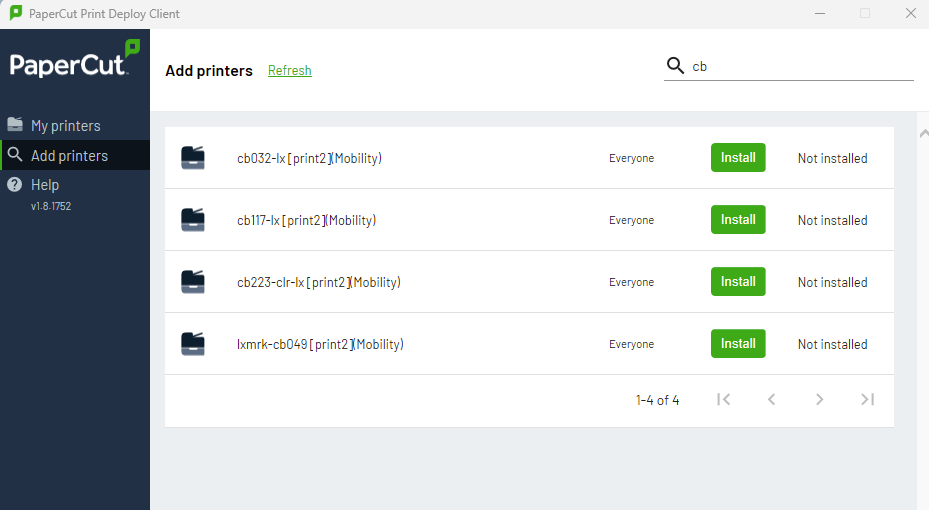
- username only, no @uregina.ca
- “Sign-in” option will show after “Install” is clicked for a printer. The sign-in only needs to be done once.
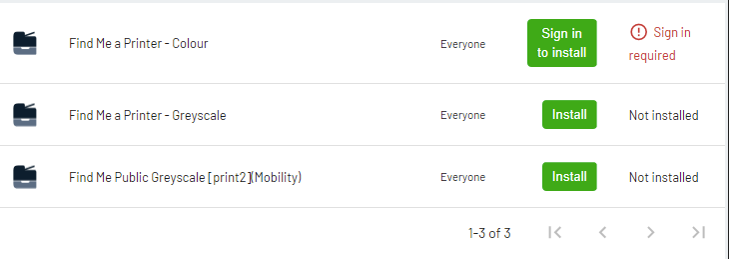 6. The printers take approximately 5 minutes to install. Once installed, right-click on the PaperCut Print Deploy icon in the taskbar and select “Refresh my printers now” to verify the new print queue is showing.
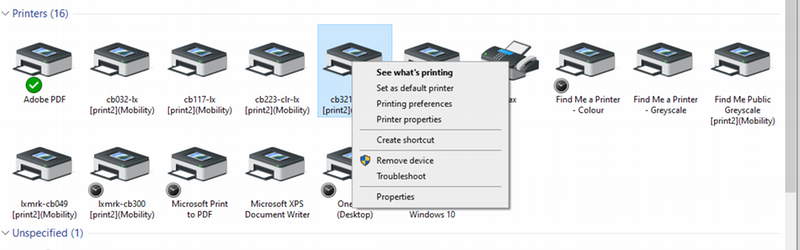
6. Your printers are now installed. If you would like to set a default printer, this can be done in the Control Panel by right-clicking on the desired printer and choosing the option of “Set as default printer”
Conclusion
Installing Papercut client on Windows OS is described.
For additional support contact the IS Service Desk.
Revision History
v1, 2024-11-25 - Information updated for new IS website based on information provided by network manager.
v2, 2026-09-22 - Minor edits for clarity.