
Free Campus WiFi and Internet
eduroam WiFi at the University of Regina
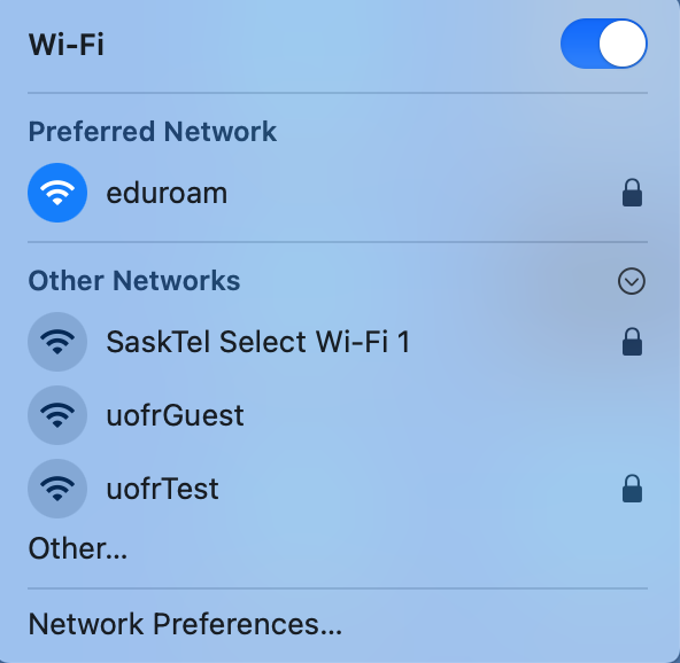
- Free Eduroam WiFi is available campus-wide, including residences and high traffic outdoor locations: it's secure, fast, and also used worldwide at many institutions.
- Choose free eduroam WiFi: Login with username@uregina.ca and password.
Android Devices
Connecting to eduroam using the "geteduroam" app – Android 8 and higher
Note: Any device under version 14 is best effort support (older than the two latest releases).- Forget the eduroam network on your device if it is saved.
- Connect to your cellular provider’s data network or connect to the UofRGuest WiFi network.
- Navigate to the Google Play store.
- Install the geteduroam app; The publisher is SURF B.V.
- Search for University of Regina
- Click on the University of Regina entry that is displayed & the logon screen will appear.
- Enter your username and append @uregina.ca, for example: abc123@uregina.ca. NOTE: Do not enter first.last@uregina.ca in the username field as this will not work.
- Enter your uregina password & click Log In
- geteduroam will prompt you now, or later, to “Allow suggested Wi-Fi Networks”, select Allow
- A prompt will appear to save the network, click Save
- Click Close App
If your credentials were entered correctly, you should now be connected to eduroam, if not, select eduroam from your Wi-Fi settings screen to force the connection.
Credential or Authentication Problem Error
If your eduroam entry in Wi-Fi settings indicates there is a credential problem, you may have entered your credentials incorrectly, if this is the case:
- Open the geteduroam app
- The “Select a profile” page should be presented with the University of Regina entry; If not, from the geteduroam main screen, select University of Regina
- Click the two arrows (in a circle) at the bottom of the screen.
- Click reconfigure device
- Re-enter your uregina credentials & click Log In
- Download eduroam software from https://cat.eduroam.org/#eduroam
- You do not need to look for the software download on your device, nor run the software. Once you download, eduroam will automatically read your device type for a proper software install.
- Look for WiFi with your device and select eduroam.
- Enter your credentials: your username@uregina.ca and your password.
- If you see; Select Certificate - Don't check 'validate.'
- After dowloading from https://cat.eduroam.org/#eduroam automated setup (you don't need to locate or run software), you may need to enter the Domain: uregina.ca to connect to eduroam.
- Certificate should be set to: Request Validation
Apple iOS/MAC Devices
Method 1
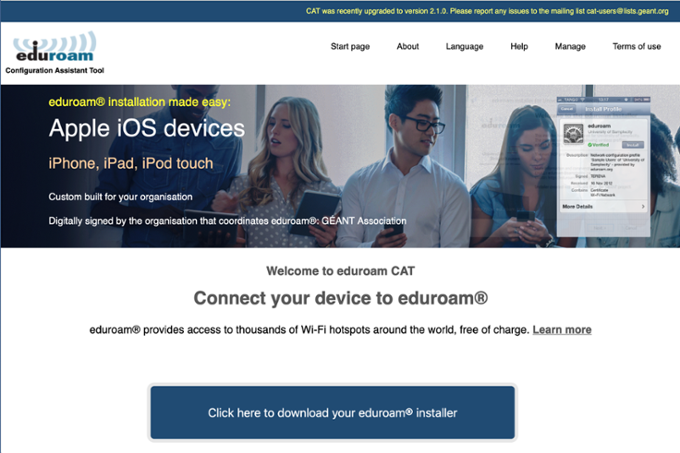
- Go to the eduroam Configuration Assistant Tool website.
- Click the Click here to download your eduroam installer link.
- Select University of Regina.
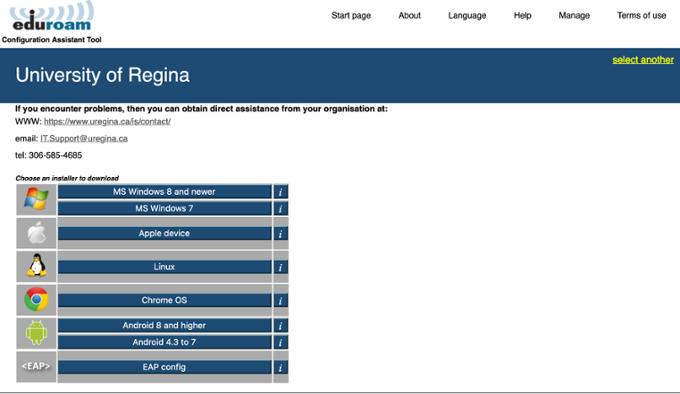
- Click the Download your eduroam installer link (this is automatically detected) to download.
- To select an eduroam installer for another supported device click Choose another installer to download and select an operating system to download.
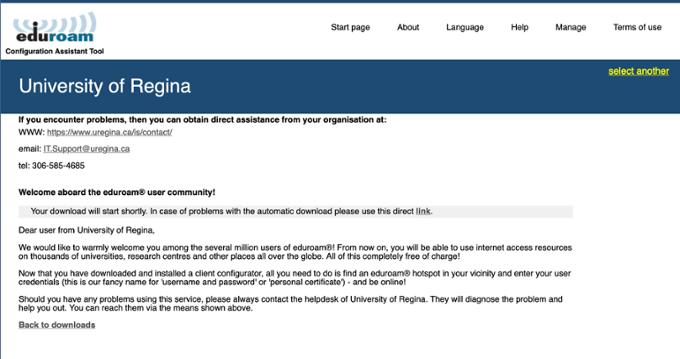
- eduroam will download automatically. If not, you can download from a provided link.
- The eduroam file will be in your downloads (double click to open) or it will open automatically. You will see the Welcome to eduroam installer window. To run the installer, click Next and then click OK to continue the installation.
- When prompted enter your @uregina.ca username (full email) and password and click Install.
- When the installation is complete, click Finish.
Method 2
- Open the Wi-Fi Networks window (from the Home screen select Settings > Wi-Fi) and select eduroam from Networks list.
- When prompted for credentials input your uregina.ca username and password and tap Join. Your uregina username must be in the format of username@ uregina.ca (this is your email account with your username).
- You will be prompted to trust the GEANT certificate. Click Trust to connect to eduroam.
- Make sure the Remember this network option is checked. You are now connected.
Method 1
1. Go to the eduroam Configuration Assistant Tool website.
2. Click the Click here to download your eduroam installer link.
3. Select University of Regina.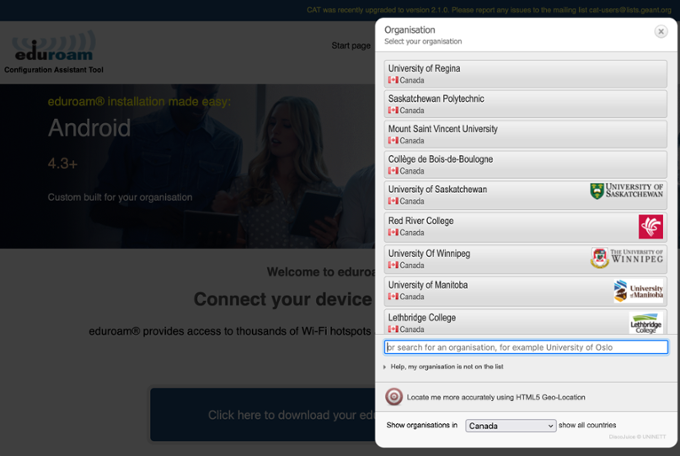
4. Click the Download your eduroam installer link (this is automatically detected) to download. 5. To select an eduroam installer for another supported device click Choose another installer to download and select an operating system to download.
6. eduroam will download automatically. If not, you can download from a provided link.
 7. The eduroam file will be in your downloads file (double click to open) or it will open automatically. You will see the Welcome to eduroam installer window. To run the installer, click Next and then click OK to continue the installation.
8. When prompted enter your @uregina.ca username (full email) and password and click Install.
When the installation is complete, click Finish.
Method 2
1. Select the Wireless symbol from the menu bar.![]()
3. Select eduroam.
 4. You will be prompted to enter your credentials
5. Enter the following details:
Mode: Automatic
Username: Your uregina.ca username must be in the format username@uregina.ca (this is your UR email)
Password: Your uregina.ca password
Show Password: As required
Remember this network: If ticked, your password will be stored in the Keychain and you will not be prompted for your credentials again unless the connection fails.
6. Click Join
7. You will be prompted to trust the GEANT certificate. Click Continue to connect to eduroam.
8. To make changes to your Certificate Trust Settings you may need to type in the password of your machine. Click Update Settings to connect.
- Open Keychain Access from the Utilities folder.
- Select the login keychain on the left, and then Passwords for category.
- Click on any saved items related to eduroam (and uofr/uofrWPA if you have these old networks) and press the delete key to remove them.
- Close Keychain Access, and restart your computer.
- Open System Preferences, click on Network, select AirPort and then click Advanced.
- Under the AirPort tab, click on and press the Minus (-) button for any of the following: uofr guest, uofrPSK.
- Click OK
- Click Apply
- Right click the WiFi icon in the upper right corner of your screen.
- Choose Open Network Preferences.
- Click Advanced at the bottom right.
- Hold down the Option Key, and click the WiFi icon in the upper right corner of the screen.
- The MAC address will be at the top of the drop-down menu.
After the card is registered you can configure your computer to use DHCP to obtain its IP address.
- The DHCP protocol will automatically provide the IP, DNS server, and gateway addresses needed by your computer to connect to the U of R network by network cable plugged into a network drop.
- For further assistance, please contact the IT Support Centre.
PC Windows Computers
Method 1
- Go to the eduroam Configuration Assistant Tool website.
- Click the Click here to download your eduroam installer link.
- Select University of Regina.
- Click the Download your eduroam installer link (this is automatically detected) to download.
- To select an eduroam installer for another supported device click Choose another installer to download and select an operating system to download.
- eduroam will download automatically. If not, you can download from a provided link.
- The eduroam file will be in your downloads (double click to open) or it will open automatically. You will see the Welcome to eduroam installer window. To run the installer, click Next and then click OK to continue the installation.
- When prompted enter your @uregina.ca username (full email) and password and click Install.
- When the installation is complete, click Finish.
Method 2
1. Click on the WiFi icon located at the bottom right hand corner of the task bar to turn on the WiFi antenna. ![]()
2. Select eduroam from the list of available Networks and select Connect
3. Click Connect. 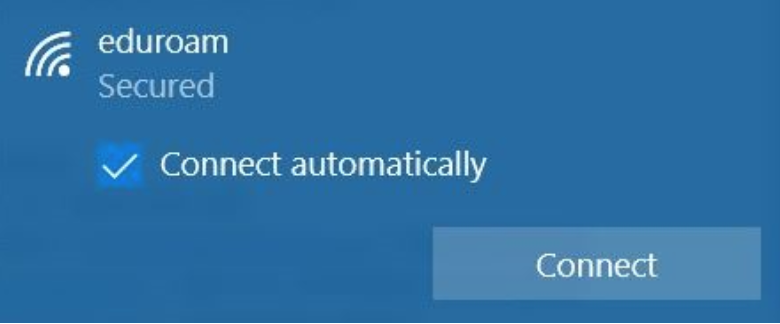
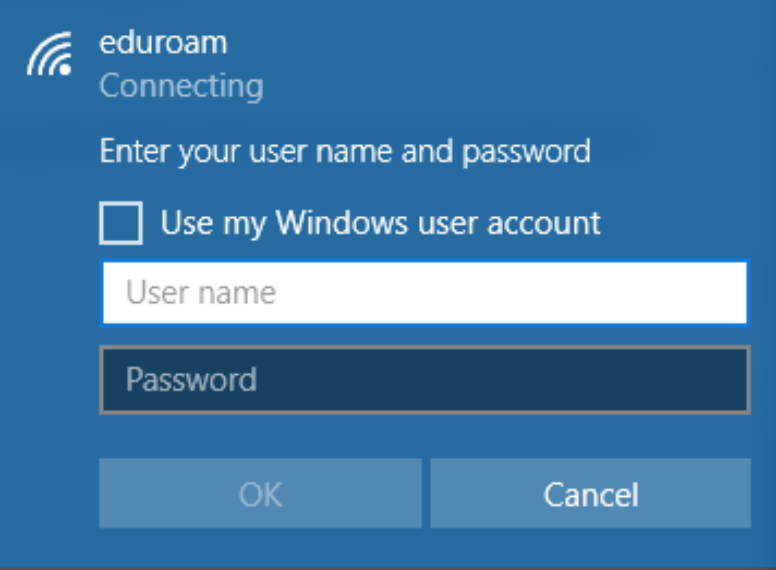
4. Enter your username@uregina.ca and password, click OK. Do not check the "Use my Windows user account."
5. You will be asked if you wish to Continue connecting? Select Connect.
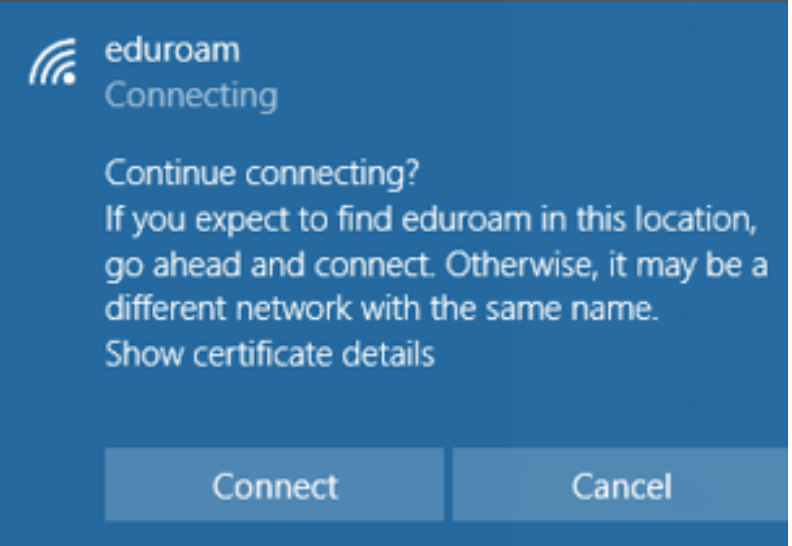
If successfully authenticated the status will change to Connected. This may briefly display as Limited. You will now be connected to the eduroam service.
Certain versions released through Microsoft Update of the Intel Centrino Advanced-N wireless drivers have a bug with WPA2-Enterprise, used by the eduroam network, but work fine with WPA/WPA2-Personal encryption used by most home routers.
- The latest version of the driver can be downloaded from Intel directly.
Linux Systems
- Download eduroam software from https://cat.eduroam.org/#eduroam
- You do not need to look for the software download on your device, nor run the software. Once you download, eduroam will automatically read your device type for a proper software install.
- Look for WiFi with your device and select eduroam.
- Enter your credentials: your username@uregina.ca and your password.
- If you see; Select Certificate - Don't check 'validate.'
Wired Connection, Gaming, and Other Info
Users with access to a wired network drop should use it, as it provides reliable dedicated 1Gbit/sec access to the network compared to the bandwidth-limited wireless connection.
- To connect to the U of R network via a wired network port, contact the IS Service Desk to register your device. You will need to provide your device’s MAC address.
- In residence rooms with a network drop, your computer must be set to DHCP to automatically receive an IP address, which will remain the same unless the computer is turned off for more than 5 days.
Note: IP addresses are automatically provided only in your residence room.
- Students not in residence, or residence students connecting elsewhere on campus, can register a device for wired network access by logging into the BOOTP page and registering the device’s physical MAC address.
- Xbox, Playstation, Wii, Non-eduroam Compatible Devices (uofrPSK WPA2-PSK with AES Encryption).
If your device allows you to browse for WiFi networks, you will see multiple choices on campus.
- uofrGuest is offered to provide easy initial access and should not be used as a normal access method because it has a few major limitations. It is not encrypted. This is used by many people who visit our campus temporarily.
- Limited bandwidth (20Mbitt/s).
- Restricted ports, and some services may be blocked.
- SaskTel Select Wi-Fi 1 networks are automatically configured on the majority of SaskTel wireless devices and offers wireless access to SaskTel customers.
- As thisSSIDD provides high bandwidthinternett access via a dedicated link to SaskTel, it is recommended that thisSSIDD be used instead ofeduroamm on SaskTel phones that are capable.
- UsesWPA22AESS encryption and a unique hardware identifier in the phone for authentication.
- For more information see the SaskTel Support page for Using SaskTel Select WiFi.
- uofrPSK is intended only for devices that are incompatible with eduroamm (i.e.Xboxx, PlayStation,Wiii). It usesWPA22-Personal WPA22PSKK) withAESS encryption and a pre-sharedpassphrasee.
- Devices on this network must be registered by their hardware address (MAC address) before they are able to connect. Note: Only available in residences.
- NOTE: WiFi signals for the legacy uofrPSKSSIDD can be snooped and decrypted by technical savvy users of our wireless network.
This network is intended only for wireless devices that are NOT compatible with WPA2-Enterprise encryption used by eduroam.
To connect to uofrPSK your wireless devices physical address (MAC address) will need to be registered on our network.
Self registration option: Wireless Card Registration or contact the IS Service Desk.
Note: Devices registered for the uofrPSK network that are capable of connecting to the eduroam network will be removed.
Once you have registered your device's MAC address you are ready to connect to the uofrPSK network.
Network Information
SSID: uofrPSK (enter manually as the network is not broadcast publicly)
Encrption Type: WPA2-Personal or WPA2-PSK (AES encryption)
Pre-shared Passphrase: <Provided by Wireless Card Registration/IT Support during registration>
- Go to 'Wii Settings' on the initial screen after powering on.
- Select 'Internet' (on Page 2).
- Select 'Console Information'.
- The MAC Address is listed on the first line.
Determine the dashboard on your Xbox 360:
- the 360 has been updated with the "New Xbox Experience" (NXE) dashboard. This is easily identifiable by the presence of avatars, the "Video Marketplace" with Netflix, etc.
- the 360 has not been updated to the NXE and still runs the old 360 dashboard.
- Scroll Down (if necessary) to "My Xbox"
- Go all the way to the right and select System Settings
- On the new screen, select Network Settings
- Select Configure Network
- Under Basic Settings, check to make sure IP Settings is on Automatic
- Go right to select the Additional Settings Tab
- Go down and select the second item Advanced Settings
- Toward the bottom of the screen you should see Wired MAC Address. The MAC Address appears below.
- Go right to reach the System "blade" of the Dashboard
- Select Network Settings
- Select Edit Settings
- Under Basic Settings check to make sure IP Settings is on Automatic
- Go right to get to the Additional Settings Tab
- Go down to select Advanced Settings
- Toward the bottom of the screen you should see Wired MAC Address. The MAC Address appears below.
- In the XMB home menu, go to Settings icon (Settings) > System Settings icon (System Settings) and press the X button icon button.
- Scroll until you see [System Information] and press the X button icon button.
- You will see your MAC Address listed.
- In the XMB home menu, go to Settings icon (Settings) > press the X button icon button.
- Scroll down until you see Network > press the X button icon button.
- Scroll down until you see View Connection Status > press the X button icon button.
- You will see your MAC Address listed.
1. Click START
2. Click RUN...
3. At the run command line type: CMD and click OK or press the ENTER key
4. At the next prompt type: 'ipconfig/all' and press the ENTER key
5. Look for the Ethernet adapter wireless Network connection physical address
6. Write down the Physical Address.
7. At the prompt type 'exit' to close this window.
- Cards that support all of the IEEE802.11 A/G/N/AC/AX standards (or a dual band 802.11AC card that supports 2.4 and 5GHz bands) are recommended as the 5GHz standard provides higher speeds and more non-interfering frequencies.
- All access points at the U of R support the AC standard and are dual band capable.
- Beware that a lot of 802.11N cards only support the 2.4GHz spectrum - look for terms like dual band or 802.11a or 801.11ac in the specifications.
- eduroam is the fastest WiFi on campus and provides per user encryption, which is very secure.
- uofrPSK uses the WPA2 to encrypt traffic from your device to the wireless access point, but all campus users have access to the encryption key, which can allow technical savvy users to decrypt all wireless traffic, so it's not as secure as eduroam.
- If you are using uofrPSK or uofrGuest it is recommended that you switch to eduroam.
- Do not enter sensitive information on web pages, unless there is a padlock symbol shown (with the padlock locked).
Troubleshooting WiFi
Also, check the following:
- Try your username and password with another application to make sure you can login. For example, try logging into Outlook.
- Passwords for the eduroam network are case sensitive, so check that your password is correct.
- You may want to change your password and then try logging in again.
- Make sure you have selected the "Thawte Primary Root CA" under 'Trusted Root Certification Authorities.'
- From the Home screen select Settings > General > Wi-Fi.
- Select the 'i' icon next to the eduroam network. This will display the configuration for the network.
- At the top of the screen is a Forget this Network button. Tap Forget this Network and select Forget when prompted.
- You can now try connecting to eduroam again.
- See, System Alerts for planned maintenance or outages on campus.
- The IT Support Centre may have disabled your WiFi because you have a virus.
Due to the nature of WiFI signals, which are affected by barriers such as walls, bookshelves, elevators, etc., it is difficult to give a guaranteed list of rooms where wireless coverage will work. All areas now support the IEEE 802.11ac standard.
- To request an enhancement to wireless coverage or capacity in a particular area, please contact the IS Service Desk.
Make sure you have:
- Registered your card for using the uofrPSK SSID and verify that you have entered the correct passphrase when you configured your client software.
Free Student Website Space!
URL for Personal Website
The URL for your personal website is http://uregina.ca/~username
Create first main Webpage
- Note: Web design software is not provided.
- You can create your .HTML files in any commonly available web design program, such as Dreamweaver, MS Sharepoint Designer, Google Web Designer, or CoffeeCup.
- Create your webpage first, then upload the files to your space on the uregina.ca server (http://uregina.ca/~username).
- Your main webpage file must be named index.html
- HTML files can be transferred to your uregina.ca account using SSH file transfer software.
- Transferring files to the UR web server must be done using SSH protocol. SSH login to uregina.ca uses your usual uregina.ca username and password.
- The server uregina.ca is able to provide secure file and terminal access via the openSSH suite.
- You need to download and install the appropriate ssh/scp/sftp clients, if not already installed on the computer system you are using.
FTP access through ftp.uregina.ca has been disabled due to security concerns, and is no longer supported.
Windows Systems Setup
- Install both winSCP Secure Copy Client and PuTTY Terminal Emulation Program with SSH Support software for Windows computers.
- The release notes for PuTTY and WinSCP, provide additional information about the packages.
Non-UofR Users
The source location for PuTTY and WinSCP are located at:
Mac Systems Setup
- MacOS has a built-in SSH client called Terminal. Search for Terminal to open the program.
Linux Systems Setup
- Linux, *nix, BSD, and related platforms will use the openSSH suite which is generally installed by default.
- Information about openSSH can be found at https://www.openssh.com/
- Once both PuTTY and winSCP have been installed, open winSCP from Start-Programs menu.
- Enter Host name: uregina.ca, Port number: 22 (Note: You may have to click NEW... at the top right to get the 'Session' window with blank Host name to open).
- Enter your usual uregina.ca username and password (Note: remaining fields can be left blank).
- Click Login (Note: You may get a "server host key not found" error, if so, click Yes to continue).
- You will now be connected to your personal files, with your C: drive on the left side, and your I: drive files on the right side.
- Double-Click the public_html directory on the right side to open it.
- Navigate through the folders on the LEFT side to where you have stored your index.html file.
- Click and drag the index.html file over to the RIGHT side and click Copy in the pop up window.
- If you are modifying an existing file that is already there, it will prompt you that the file exists. Click Yes to overwrite the old file with the new version.
- Continue dragging any other webpage files and images that you need for your website.
- You need to delete the index.html file in the public_html directory on the RIGHT hand side.
Click the file once so it is highlighted, then click the red X at the bottom to delete or press F8.
Be very careful you are not deleting anything on the LEFT hand side, which is your current C: drive files. - You should also delete the remaining files in the public_html directory if you do not want them to be accessible online.