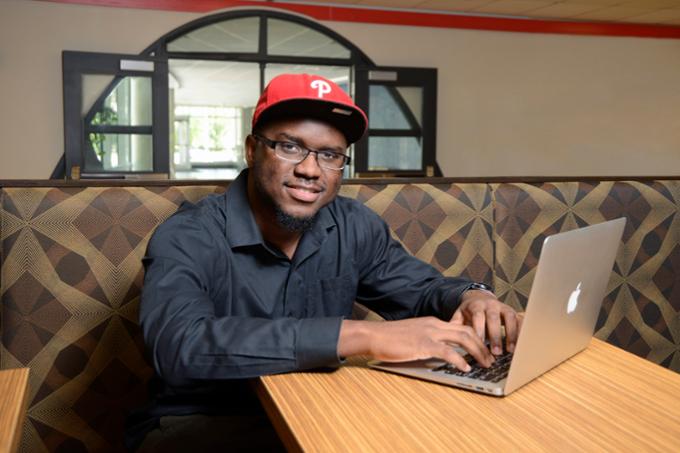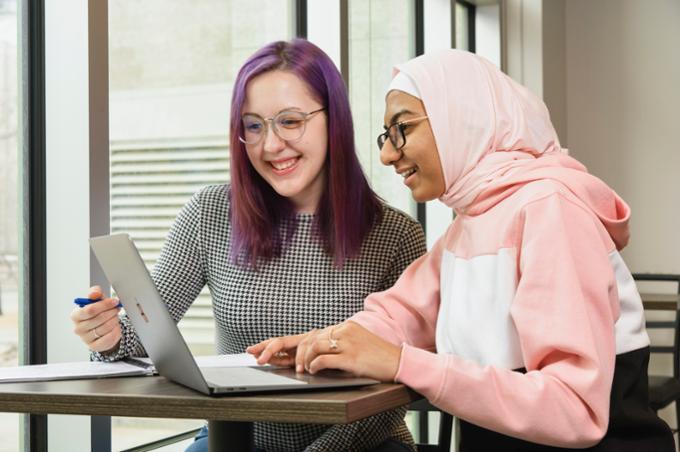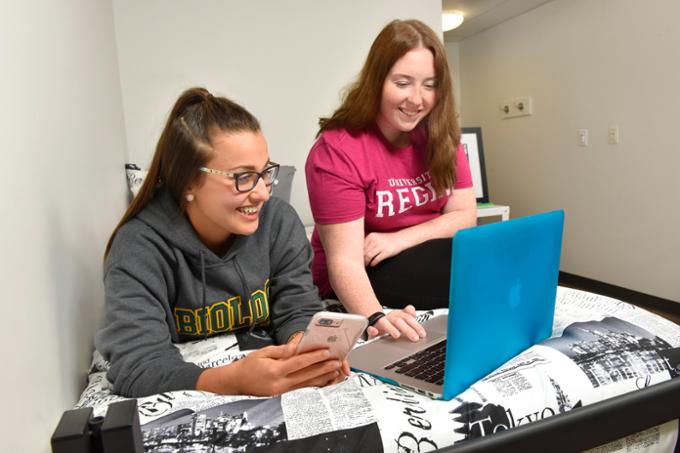
Study and Work Off-Campus
Remote Learning
- Please limit use to required academic work and log off the campus computer (not just Remote Desktop) when finished so others can access it.
Technical Requirements and Info
What if I am unable to access a computer?
- See, Public Computer Lab Locations for more info.
- See Dr. John Archer Library Commons for up-to-date info for library services.
- The Archer library has laptops that can be borrowed, see https://library.uregina.ca/borrowing/equipment
- The Archer library IS Service Desk is open to assist you.
What if I don't have a webcam?
- A smartphone can be used as they have built-in webcam, microphone and speaker for attending Zoom meetings.
Minimum requirements are a computer or laptop with a current web browser and basic software.
- Microsoft Windows 11 is recommended.
- Apple macOS macOS Tahoe 26 is suggested or greater will also work, except for some specialized software.
- Other operating systems may work but are not supported.
Recommended Computer System
- A newer Windows computer, preferably less than about 4 years old, including a monitor, mouse, and keyboard.
- Windows 11.
- Microsoft Office (M365) is free for Students
- Backup device or service.
- Security Software (Anti-virus/firewall).
- Web Browsers: Firefox, Safari 8 or greater, Edge, Chrome.
- Internet connection, preferably high-speed ADSL, Cable, or similar.
- The following items may also be required or beneficial for some courses:
- Optical Drive.
- Colour Printer.
- Scanner.
- Speakers/Headphones.
- Web Camera and Microphone.
- Administrator rights.
A typical home internet package is usually sufficient, though requirements may vary depending on whether a course is text‑based, media‑rich, or involves real‑time communication.
Basic Internet Bandwidth, Connection Speed Recommendations
Primarily text-based online courses:- Internet Download Speed: 1.5 Mbps
- Internet Upload Speed: 1.0 Mbps
- Internet Download Speed: 5.0 Mbps
- Internet Upload Speed: 1.0 Mbps
- Internet Download Speed: 5.0 Mbps
- Internet Upload Speed: 1.0 Mbps
Note: If you are experienceing video issues, you may be able to continue a zoom meeting by turning of the video and using audio only.
Test Internet Speed Info
- Ensure you are connected to your home internet
- Open a browser window and go to Google.ca
- Search for 'Speed Test,'
- Click 'Run Speed test'
Proctortrack Exams and Online Exams
- OR MacOS High Sierra 10.13 or higher.
- OR Mac – Intel/Apple Silicon Processor with minimum 8 GB RAM.
- OR Google Chrome v100.0 or higher.
Plug-ins: Javascript enabled and Third Party Cookies enabled.
Webcam with camera resolution 800x600 or better
- minimum Download speed of 1.5 Mbps.
- minimum Upload Speed of 1.5 Mbps.
We are aware that some students do not have access to the appropriate computer equipment or quiet space to take an online Proctortrack exam. With approved academic accommodations you can book through the Brad Hornung Accommodations Test Centre. You have the option to book an exam room in the Accommodations Test centre (ATC).
- To take advantage of this option, you need to email ATC.Testing@uregina.ca, requesting access to book an exam room for taking a Proctortrack exam.
- Once access has been granted, you can login to the 'Accommodate' an online booking system and book a Proctortrack Exam Room.
- If you don't have accommodations, you cannot book an exam with the ATC. Please contact your Faculty if you need assistance.
Windows
- Click Windows icon in lower left corner, click 'Settings' gear icon, scroll down to the bottom and click "About" on the left side.
Mac OS
- Click the Apple logo in top left corner, click 'About this Mac', then click 'More info...'
If your instructor is using Proctortrack, you will need to take an 'Onboarding' quiz in that course.
Note: Onboarding is required in each course that is using Proctortrack.
- Take the Central Onboarding Quiz, which will prompt you to install the software so you are set up for futures exams, and set up your Onboarding Profile with Proctortrack. See Practice Exams information above.
Learn about Proctortrack
- Read the detailed Proctortrack Student Manual for further information.
To remove Proctortrack from a Windows system
- Unistall the Proctortrack software
- Windows: Click the Start Window at bottom left corner
- Scroll to the 'P' section
- Right-Click 'Proctortrack' and click 'uninstall'
- In the "uninstall or change a program" window, scroll down the list and locate Proctortrack
- There may be more than one to remove, if you have taken multiple Proctortrack exams - Right-click the file and click "Uninstall"
- MacOS: Open Finder
- Click and drag 'Proctortrack' to the Trash, or select the app and choose File >move to trash
- Open Trash and delete the Proctortrack folder from trash (right click & delete)
- Windows: Click the Start Window at bottom left corner
- Delete 'Proctortrack' folder from App Data
- Windows: Delete "Proctortrack" folder from user 'App Data' folder
- Open File Explorer - Open Local Disk (C:) - Open 'Users' folder
- Locate your user folder (the user you are logged into the computer with)
- Open the 'AppData' folder
- Locate and Delete the 'Proctortrack' folder
- MacOS: Delete "Proctortrack" folder from 'Application Support' folder
- Open Finder
- From the top menu select Go
- Hold the Option key
- Select Library from the menu list
- Open the folder 'Application Support'
- Select the folder called Proctortrack and move the Proctortrack folder to trash (only the Proctortrack folder and no other)
- Open Trash and delete the Proctortrack folder from trash (right click & delete)
- Windows: Delete "Proctortrack" folder from user 'App Data' folder
- Clear Browser Cookies
- Open the browser you use for Proctortrack (ie: Chrome or Firefox)
- Open the Settings menu (gear icon at top right corner)
- Go to Privacy & Security – Clear browser data – Cookies & other site data – Clear Data
To remove Proctortrack installers/downloaded files
- Open the File Explorer window
- Click Start window at bottom right
- Start typing 'File Explorer' to search for it
- Click 'File Explorer' app - Locate and click the 'Downloads' folder (or other folder where you files are set to download to)
- Enter 'Proctortrack' in the search windows at top right and press enter to search for Proctortrack
- Note: If Proctortrack is not found, click on "Local Disk (C:)" on the left, then enter 'Proctortrack' in the search bar at top right and press enter to search for it - Locate files named Proctortrack.exe (or Proctortrack(1).exe, or Proctortrack(2).exe, etc).
- There may be more than one if you have taken multiple Proctortrack exams - Delete all Proctortrack files that end with .exe
- Right-click the file and click 'Delete'
To install or re-install Proctortrack and Test Functionality:
- Access the Student Practice Exam in UR Courses
- Take the Onboarding Quiz (will prompt installation of the latest version of the software).
- Take the Practice Exam (will prompt installation of an additional component of the software).
NOTE: Installing ahead of time is unnecessary but may be helpful to ensure you do not encounter issues at the start of an exam. When you access an exam in UR Courses, you will be prompted to install the appropriate software if it is not already present.
For assistance, contact the IS Service Desk.
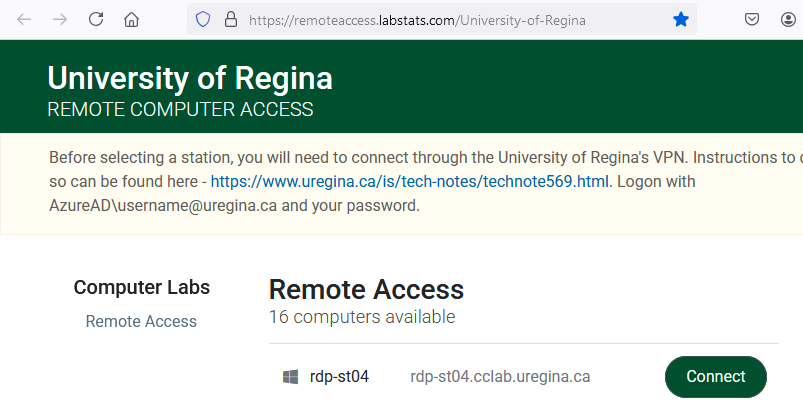
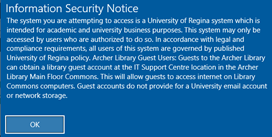
Remote Access to Computer Labs
- Some software is limited to on‑campus use due to licensing.
- Off‑campus access requires the University VPN, while on‑campus access is available via eduroam WiFi or a wired connection
- Some university courses require software that is licensed for on‑campus use only. Access is available on campus via the eduroam wireless network or a wired connection, and off campus through the University’s VPN.
- Please limit usage to required academic work and log off the computer (not just the Remote Desktop session) when finished so others can access it.
Reminder: Remember to save your data to OneDrive. Any data saved to the desktop or elsewhere on the Remote Desktop Protocal (RDP) computers will be deleted periodically.
- Connect to the University of Regina network through Forticlient VPN Software.
- VPN Software can be downloaded from https://vpn.uregina.ca (click Download Forticlient - top of the page).
- Instructions for Installing
- Once installed, launch the software and log in with your usual username@uregina.ca and password.
- Navigate to https://remoteaccess.labstats.com/University-of-Regina
- Click the Connect button to the right of an available computer (when you refresh this page the order of the machines changes to randomize access and only available machines are shown).
4. Click the Download button.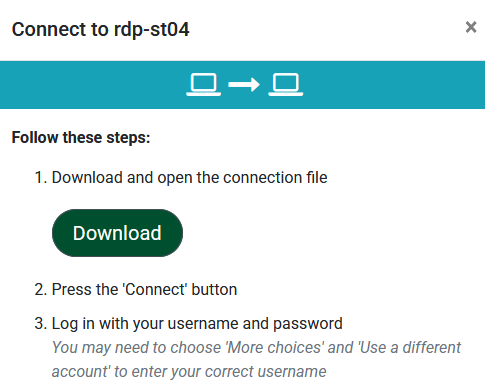
5. Select Open with 'Remote Desktop Connection (default)' and click OK.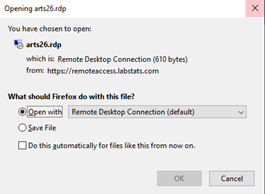
6. Click Connect.
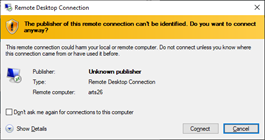
7. Click Yes.
8. If you haven't connected before and it is just showing <username> instead of username@uregina.ca then you should select 'More choices' and login with username@uregina.ca.
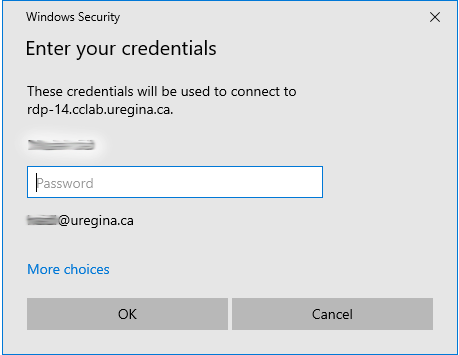
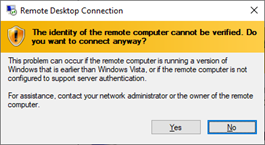
9. Click OK if you agree.
10. If you want to use Zoom to share your screen with a TA/Instructor please see Zoom in RDP tips.
11. Make sure your data is stored on your OneDrive before logging out. See Nvivo example.
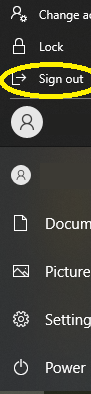
12. When finished, please either double-click the Logoff desktop icon or click the Windows Start Menu, click the Person icon, then Sign out to end your remote desktop.
 |
or  |
- Mac users will first need to install an app for RDP (Remote Desktop Protocol). RDP is available from https://apps.apple.com/ca/app/microsoft-remote-desktop/id1295203466?mt=12
- Then connect to VPN and RDD, using instructions below.
- Further info for Remote Desktop Connection can be found at RDP Instructions (PDF)
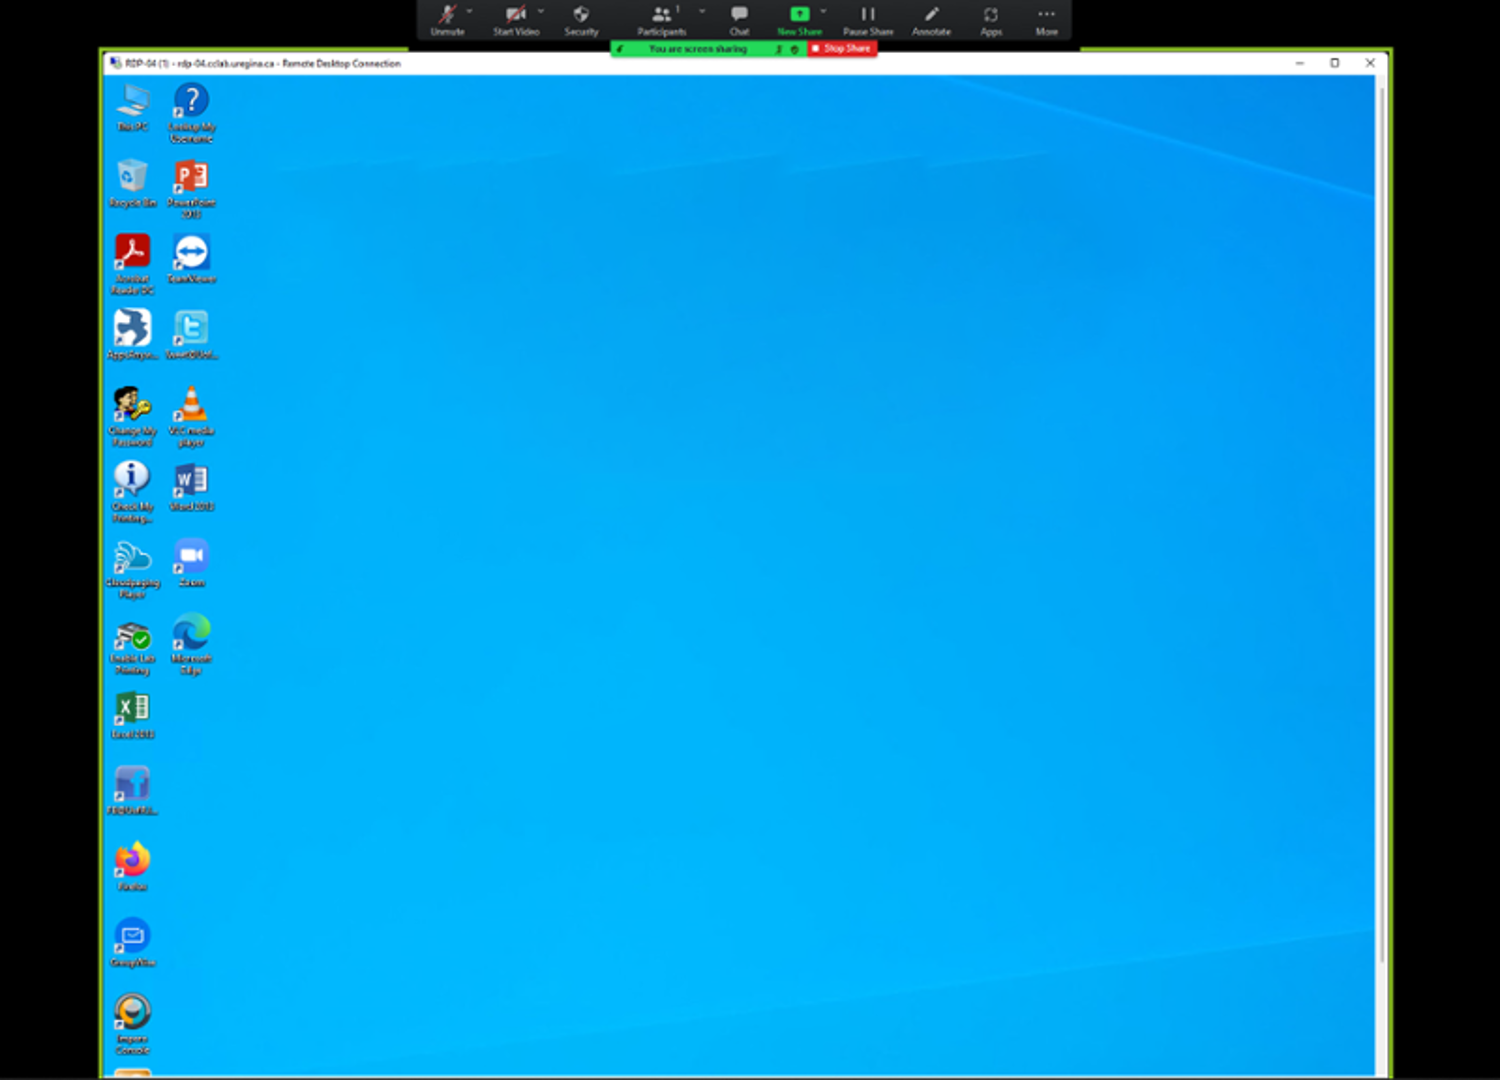
You can share a Remote Desktop Protocol (RDP) screen with another person. This can be confusing as you are simultaneously working on two computers - yours and the remote computer. If you run zoom on the wrong computer then you can have bad performance.
Ensure
- You are logged into your own laptop, a PC or Mac
- You have connected to a remote lab computer at the University via RDP as per abov.
Before proceeding ensure you are able to tell the difference between whether your screen is showing your desktop or the remote desktop and how to switch between the two.
- Typically the desktop on the remote computer will have different icons than your desktop. If you require assistance. please contact IT Support.
RDP Screen Share:
Step 1: Start zoom on your computer - it is important you don't run Zoom on the remote desktop.
Step 2: While sharing an RDP session on Zoom using any personal PC/Mac, please select the RDP screen window. 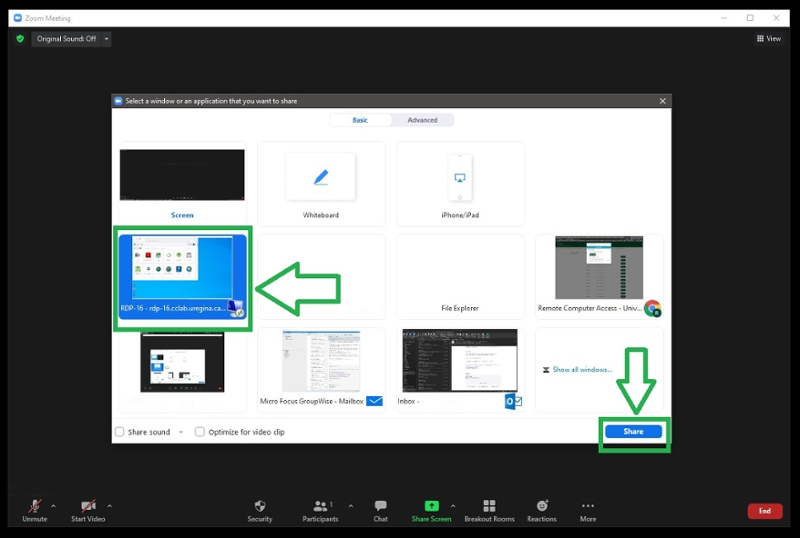
Then, select Share on Zoom to start sharing the RDP Computer window.
The following is an example of how to create or open a saved NVivo project file on a public lab computer using Windows 11 and OneDrive.
To ensure the NVivo project file or saved file is located correctly:
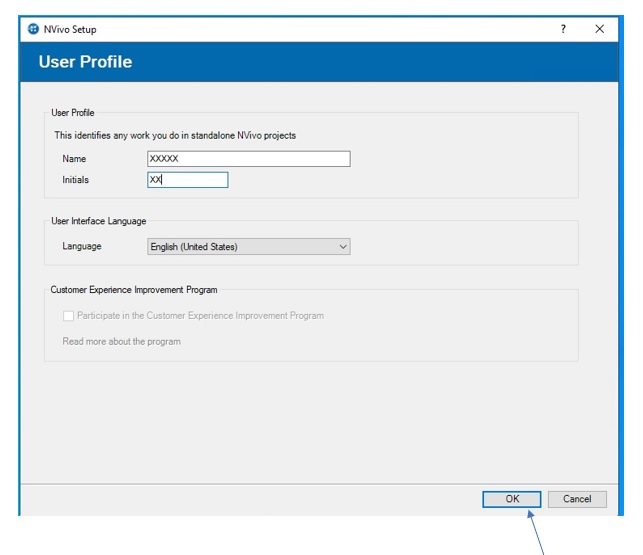
STEP 1
- Launch NVivo from the Start menu.
-
Note that 'Please wait while NVivo loads' can take 15 seconds if it is the first time it has been launched on the system
- Please fill in user name: University of Regina user name
- Please fill in Initials: XX
- Select OK
STEP 2
Creating a new project:
- Select a New Project
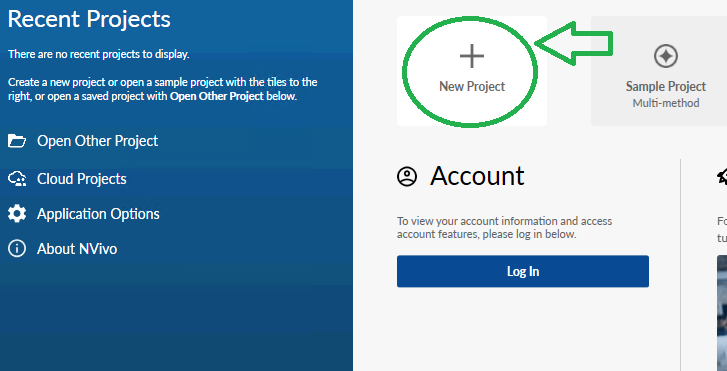
- New Project Window will Pop up, click 'Browse' and Select OneDrive
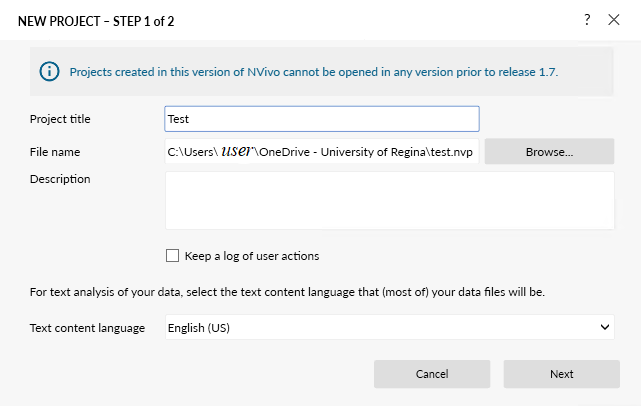
- Select OneDrive and choose the folder you want to use and select Save.
- Download VPN FortiClient software
- Install and configure the software. Full instructions for secure connection to the U of R network from off-campus can be found in Configuring VPN (Technote 569)
- Open the FortiClient VPN software
- Log in with your usual uregina.ca username and password.
- Click Connect.
- Access your web browser, log in and use the required application and other programs as usual.
- When done, click on FortiClient software along the bottom menu and click Disconnect.
Remote access via the U of R VPN, Zoom, and RDP and UR Courses can be affected for students access from certain countries.
See, Zoom Restrictions
Also, see Further Restriction Info
- It is recommended that you save files on your UofR Microsoft OneDrive so they are accessible from any remote computer including at home.
Zoom for Students
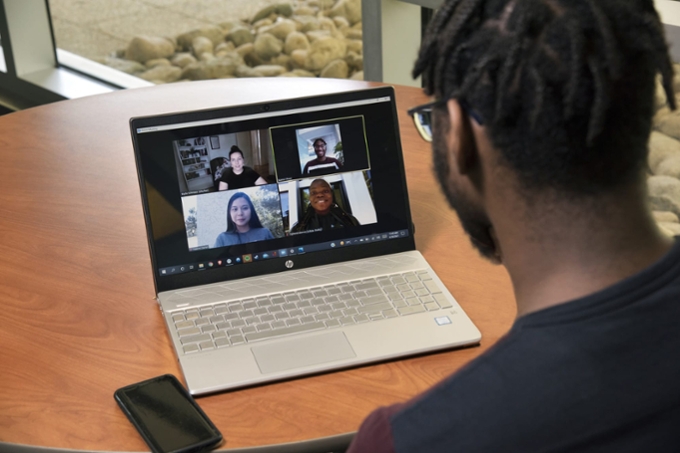
Zoom is used frequently for online learning at the University of Regina. All students registered in courses at the University of Regina have a free basic Zoom Account. Sign in with your username@uregina.ca and password for access.

- Registered students have access to a free basic Zoom account; do not create a new account, just log in with your username@uregina.ca and password.
- Log in to Zoom here
- If you need to use Zoom for meetings longer than 40 minutes with your new account, please contact the IS Service Desk and request a "Zoom Student License upgrade."
- Free Basic accounts allow up to 40 minute meetings for up to 300 participants.
- Find a quiet space.
- Grab a device - PC, Mac, iOS or Android.
- Locate the Zoom meeting link in UR Courses.
- Click on the link then click Join meeting.
- The very first time accessing zoom, you will be prompted to download a small bit of software so that you
- can access this program. This will be different, depending on what device you choose.
- Test your video camera and mic by joining one of the test sessions offered by your instructor or by connecting to the Student Peer Support Zoom Room anytime
- https://zoom.us/my/uregina.student.orientation.
- Take advantage of the tools you have to interact.
- Click on Mute, when others are talking.
- Stop Video – if you need to step away.
- Chat – if you can’t get your mic to work
- Share Screen if you are asked to share your work!
- End Meeting to leave.
Note: This is the menu for a desktop, and appears when you hover your mouse near the bottom of your screen. This menu will appear in different locations depending on your device. So please explore theroom! Have fun.
4. Considerations- Be aware of your camera angle and room noise.
- Introduce yourself, so your instructor knows you are in the room.
- Wait for a break in conversation to add your points.
- Speak clearly.
- While in a meeting, click the 'up arrow' next to the camera start/stop video icon.
- Click 'Choose Virtual Background...' to open the virtual background settings menu.
- Click the '+' symbol at the top right corner of the images section.
- Click 'Add Image'.
- Browse to the folder you saved your background image in, and select the image
OR Browse to a folder with your own saved photos, and select the image - Click 'Open'.
- The image will be added to the grid of image choices, and replace your current background.
- Close the settings window.
Note: The next time you connect to Zoom, the background you chose will still be active.
- While in a Zoom meeting, click the up-arrow next to the Start Video icon
- Click "Choose Virtual Background"
- The Settings menu will open, with the 'Background & Filters' section selected
- Click the background you wish to use, or Click "+" to upload your own image
- Click 'x' at the top corner to close the Settings window.
- While in a meeting, click the 'up arrow' next to the camera start/stop video icon.
- Click 'Choose Virtual Background...' to open the virtual background settings menu.
- Click the 'None' image in the images section
OR if desired, select another image to use as your background. - Close the settings window.
- If your course instructor includes Zoom classroom rules in the syllabus or provides relevant instructions through other means, you should familiarize yourself with these rules and comply with them. If there is any conflict between the course Zoom regulations and these recommendations, the course regulations take priority.
- You can set your mic to automatically mute. Please, mute your mic when entering a Zoom class meeting. You can easily unmute your microphone when you are ready to speak, then mute when you finish speaking. Muting your microphone not only minimizes unwanted background noise but also can save you from embarrassing moments.
- Click your profile picture in Zoom, then click Settings.
- Click Audio.
- Select the Mute my microphone when joining a meeting check box.
- If you need to turn on your camera while participating in a Zoom class, it is recommended that you should use a U of R virtual background or blur your background. A U of R virtual or blurred background offers you privacy because other participants cannot see your actual surroundings; at the same time, it is much less distracting to other students and your course instructor compared to most other virtual backgrounds.
- You can use Zoom’s "raise hand" function when you have a question or need to comment. When you click on the raise hand function, you are automatically placed in the line and the course instructor can see all those who have raised their hands. Your course instructor can call on the students who have raised their hands according to the order in which they were placed in the line.
- If your course instructor allows students to use Zoom’s chat function, you can easily type a question or comments in the chat box. You can send your question or comment to everyone or privately to the course instructor.
- Be mindful of the fact that when your camera is on, everyone in the Zoom class can see you. You must avoid any movements and actions that may be distracting or disruptive to your classmates and course instructor (such as eating, getting up and moving around, talking to someone, playing with your pet etc.). If you find yourself having to engage in any such activities during your Zoom class, you should turn off your camera. However, if you turn off your camera to engage in some “extra-curricular” activities or multi-tasking during your Zoom class, you cannot be adequately attentive to the class lecture or discussion; and thus, you are likely to miss important parts of the
lecture / class discussion. - It is important to let other participants know when you finish asking a question or commenting by saying "thank you" or "I am finished," or another similar "sign-off" phrase. This way, other participants would take their cues that you are done and could continue the discussion or lecture without worrying about cutting you off or talking over
you. - Consider using a headset with a built-in mic, especially if the class involves a lot of class discussion. The benefits of a quality headset with a built-in mic include the following: it reduces the background feedback and noise; it provides higher quality audio enabling you to hear others better; and finally, when you speak into a microphone close to your mouth, others can hear you more clearly.
- Dress appropriately if you are expected to turn on your camera or even when there is a small chance that you may need to turn on your camera during a Zoom class or meeting.
Due to the Office of Foreign Assets Control (OFAC) sanctions, there are limitations for Zoom on services from specific countries. There is no work around for Zoom and services will not be available in sanctioned locations. Note that using the University of Regina is not an effective workaround.
For further information see, https://support.zoom.us/hc/en-us/articles/203806119-Restricted-countries-or-regions
Any photo or image that you own or have rights to can be used as a Zoom background. Instructions are provided below on how to update your background in Zoom to show a virtual background behind you during a Zoom meeting, instead of showing the room that you are in.
To download a virtual zoom background image:- Right-Click the image you wish to download.
- Choose "Save image as...".
- Select location under 'This PC' if desired.
- Click 'Save'.
Note: If you are on a mobile device you can hold on the image and a popup will reveal "save image" which will save the image to your device.
If you are downloading an image from the internet, you should ensure you have permission to use the image, or that it is free for general use.
If you wish, you can use any of the following University of Regina Virtual Zoom Backgrounds during a Zoom meeting.- Background Images for Employees: Zoom Backgrounds